| Home Prev | Next |
Introduction
It is possible to configure EasyAccess to act as a federation service provider. As a service provider, EasyAccess becomes an HTTP server which makes available a MyApps webpage. This webpage will contain HTML links to multiple HTTP applications found on other, external service provider servers. Typically, a MyApps page is used as a landing page for single sign on (SSO) access to various applications.A MyApps webpage is set up in EasyAccess by creating a MyApps Scenario, which can be found under Scenarios > Applications in the EasyAccess WebUI. Multiple such MyApps scenarios can be created, each providing a different webpage with different sets of external service provider links.
When a user tries to access a MyApps webpage for the first time, EasyAccess acts like a normal SAML service provider and redirects the browser back to an identity provider within EasyAccess itself to generate a SAML assertion for the MyApps page. Following successful authentication, the user can then select any of the external services linked to by the webpage. However, if those external service providers are to also accept the initial authentication, they must have also been correctly configured to redirect back to the same EasyAccess identity provider for a new SAML assertion.
The identity provider to which a MyApps scenario points should already exist in EasyAccess so this may involve setting up a new federation scenario, possibly with a multifactor method. Setting up a basic federation scenario is described in Section 6.1, Basic Federation Scenario Setup. A key difference with MyApps as the service provider is that MyApps already has access to all the SAML metadata for any EasyAccess federation scenario. Similarly, federation scenarios do not need MyApps metadata uploaded. In addition, the same keystore is easily shared between MyApps scenarios and federation scenarios.
Note that it is also possible for the administrator to set up similar MyApps webpage functionality using a non-EasyAccess web server, but that will not be discussed further in this publication.
MyApps Usage with cOS Core and OneConnect
With Clavister NetWall devices, the MyApps feature can be used with the Clavister OneConnect app when it sets up an SSL VPN connection to the firewall. cOS Core acts as a RADIUS client and will connect to an EasyAccess RADIUS scenario to authenticate the OneConnect user. The RADIUS scenario can be set up with the URL of a webpage which cOS Core forwards back to OneConnect during authentication. OneConnect will automatically open this URL in the default web browser. The URL can be a MyApps webpage, with no further authentication required.Setting up EasyAccess with OneConnect is described further in Section 6.6, SSO with OneConnect Setup. This section will discuss the general case for MyApps usage.
The MyApps Processing Sequence
The typical processing sequence with MyApps for SSO of several websites is as follows:The user is authenticated using a scenario in EasyAccess and tries to open a MyApps webpage on the same EasyAccess server. As mentioned above, this might occur because the user has used Clavister OneConnect to open an SSL VPN tunnel, and OneConnect has then opened the MyApps URL in the user's browser following successful authentication.
The MyApps page acts like a normal service provider and redirects the user to the configured EasyAccess identity provider. An EasyAccess federation scenario should therefore already exist which contains the identity provider that supplies this assertion. This scenario may perform user authentication, however, it might get the authentication status from another scenario such as a RADIUS scenario (this is the case with the OneConnect client).
EasyAccess supplies the assertion and the MyApps page appears in the user's browser.
The user selects one of the service provider HTML links on the MyApps page.
The browser tries to open the HTML link on the chosen service provider's server.
The service provider's server redirects the browser back to EasyAccess, asking for a new SAML assertion, customized for that provider.
Providing a federation scenario is correctly configured for that service provider, EasyAccess creates the new SAML assertion and redirects the browser back to the provider.
The service provider allows browser access based on the new assertion.
The user can later select another link on the MyApps page and and the same cycle of the new service provider redirecting back to EasyAccess to request another SAML assertion will repeat.
From the user's perspective, the flow described above means that they could be only authenticated once and then have access to any of the service providers on a MyApps webpage.
Setting Up a MyApps Scenario
The following steps are required to set up an EasyAccess MyApps scenario.A. Create a MyApps scenario
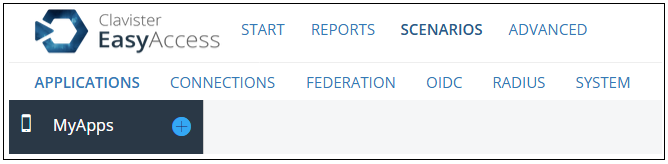
The first step is to go to Scenarios > Applications and then press the plus button next to the MyApps option in order to begin creating a new MyApps scenario.A guide will now open to gather the required data for this scenario. In the first guide step, specify a suitable name for this scenario along with an optional description. The guide defaults to the name MyApps but this could be different and should be unique within all MyApps scenarios created in the EasyAccess instance. The description is only used within EasyAccess itself and is not visible on the final MyApps webpage.
This guide step will also require the following:
The URI of the MyApps webpage. This string will be appended to the base URL of the EasyAccess server to get the full URL of this MyApps webpage. For example, if the URI is the default value of /myapps and the EasyAccess server URL is https://www.example.com, the MyApps page will be available at https://www.example.com/myapps.
The service provider identifier. This is the entityID of the service provider that EasyAccess will act as for this MyApps page. This string should be unique among all MyApps scenarios in the EasyAccess instance and among the service providers which this MyApps page will link to.
In addition, this guide step will also require the following:
A keystore must be selected which will be the same keystore used for the SAML assertions that this service provider will receive from an EasyAccess federation scenario. Uploading keystores is discussed in Section 6.1, Basic Federation Scenario Setup.
A pre-existing EasyAccess connection instance must be selected. This defines the HTTP port on which this MyApps page will be available. Normally, the predefined EasyAccess connection on port 8443 (HTTPS) would be selected.
The EntityID of the identity provider in EasyAccess which will generate a SAML assertion for this MyApps page. Usually, this will be the identity provider of a pre-existing federation scenario which will authenticate the user. If one does not exist, it will first need to be created.
In the final guide step, select Create to save the scenario.
The new MyApps webpage will be available to browsers which navigate to the URL specified for the scenario.
B. Add service provider URLs to the MyApps scenario
The next step is to edit the MyApps scenario that has been saved and to add a link for each service provider to the MyApps HTML page. The word application is used synonymously here with the SAML concept of service provider.Go to Scenarios > Applications, select the MyApps scenario that was created in step A. Select the Applications tab and then select the Show link. This will display the MyApps Application List Pipe. Each CreateApplicationValve contained by this pipe corresponds to an HTML link to a service provider on this MyApps webpage.
By default, two example CreateApplicationValve instances are included in the pipe as examples. These can be deleted.
Next, add a new CreateApplicationValve by choosing the Add Valve option and selecting that valve from the drop-down list. This displays a dialog for entering a textual description and URL for the service provider. This will appear as one of the links on the MyApps webpage.
In addition, the following can also be optionally specified in a CreateApplicationValve:
SORT ORDER
This is an integer which represents the position of the link on the webpage.
IMAGE
An image can be specified for the webpage link.
CATEGORY
A category can be specified so the application belongs to that category. Applications with the same category will be grouped together on the MyApps webpage.
After specifying all the applications required, the edits can be saved. The MyApps page URL is now accessible on the EasyAccess server.