| Home Prev | Next |
Introduction
Identity Federation allows a separate Identity Provider (IdP) to act as an identity authenticator for users accessing a Service Provider (SP). Typically, service providers are HTTP server applications. These applications may be within a single organization or provided by different organizations. A single identity provider might provide authentication for several service providers.Security Authentication Markup Language (SAML) is used to pass authentication information via a web browser between an IdP and an SP. Service providers must be set up to trust the SAML Assertions that are provided by a specific IdP. These assertions verify that a user has been authenticated by the IdP so the service provider does not need to perform further authentication.
Identity Federation with EasyAccess
EasyAccess provides a set of Federation scenarios. Each scenario might use either simple username and password authentication, or multi-factor authentication, such as Username, Password and OneTouch. When federation scenarios are created, an identity provider is also created which can generate SAML assertions for access to service providers. In other words, EasyAccess acts as an IdP.Authentication Flow
The detailed flow of authentication in a typical federation scenario is the following:The user connects to a service provider by navigating a web browser to an HTTP server URL.
The web browser is redirected by the server to the EasyAccess server for authentication.
EasyAccess presents one or more webpages to authenticate the user. Depending on the federation scenario chosen, this may involve one of the EasyAccess multi-factor authentication methods, such as OneTouch.
When successfully authenticated, EasyAccess provides a SAML assertion to the browser.
The browser is redirected back to the original HTTP server.
The HTTP server now uses the SAML assertion to verify that the user is authenticated.
The user is allowed access to the application at the original URL by the HTTP server.
The subsections that follow describe the setup required for various types of federation scenarios.
Creating a basic federation scenario in the EasyAccess WebUI will now be described in detail. The scenario created will rely on simple username and password authentication but any of the available multi-factor authentication options could be included. In addition, it is assumed the scenario will be for connection to a single external service provider.
Authenticating with multiple service providers using Single Sign On (SSO) is a special case of identity federation and setting this up in EasyAccess is discussed separately in Section 6.2, SSO Setup. However, this section should be reviewed first before looking at more complex scenarios.
A. Add Keystore
A PKCS12 file with a filetype of .p12 containing a single cryptographic key pair must be uploaded to EasyAccess to create a Keystore. This is a signed certificate which will be used by EasyAccess when it creates the SAML IdP Metadata XML file that will be used by a service provider to read generated SAML assertions. Once uploaded, a keystore can be shared across many EasyAccess scenarios.EasyAccess provides the option to use a predefined EasyAccess self-signed keystore but this option should be selected for testing purposes only since it provides minimal security.
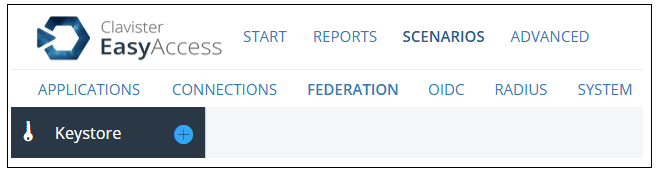
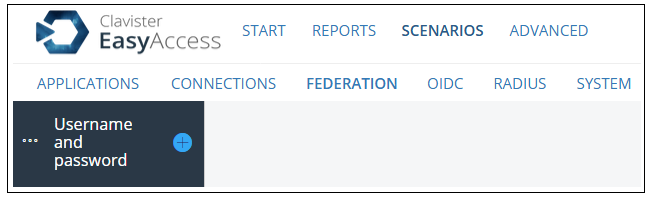
Uploading a new keystore is done by selecting Scenarios > Federation and pressing the plus button next to the Keystore option.
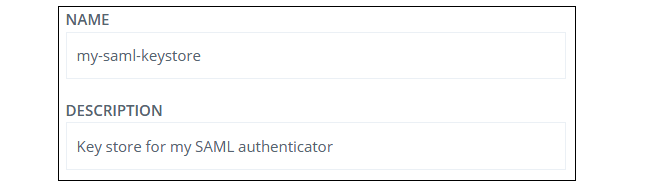
A guide will now open and the first guide step is to enter a name and optional description for the keystore.
In the next step, drag and drop a PKCS12 file into the box provided and enter the private key password to unlock the file. The password must be specified and must be correct in order to continue to the next step. The Verify and show link can be selected to check that the password matches and to show a verified summary of the uploaded file's contents.
Press Next and then Create to save the keystore.
B. Specify Service Provider's SAML Metadata
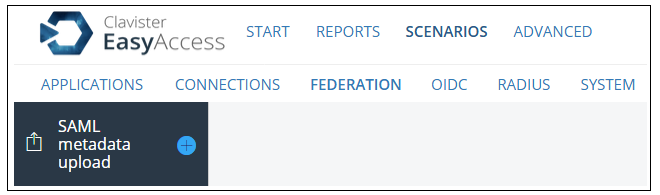
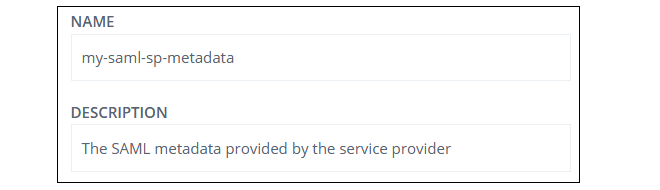
Specifying the metadata by selecting Scenarios > Federation > SAML metadata upload and pressing the plus button next to SAML metadata upload.A guide will now open and the first guide step is to enter a name and optional description for the metadata.
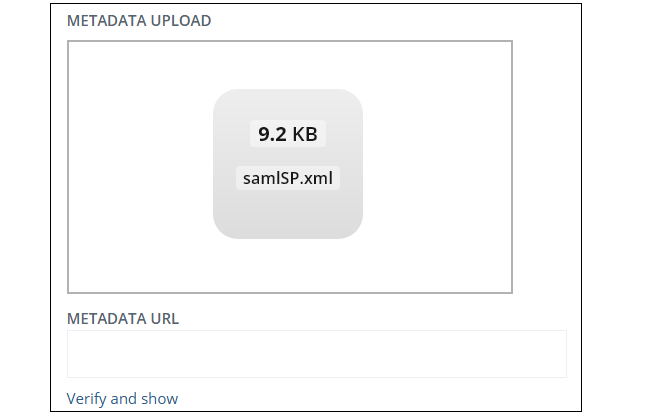
In the next step, drag and drop the metadata XML file into the box provided. Alternatively, specify a URL where the metadata can be found if the service provider makes it available in this way. The Verify and show link can be selected to show a verified summary of the metadata and is also useful to check if a specified SP URL works for fetching the SP metadata.
Press Next and then Create to save the metadata source.
C. Define a Federation Scenario
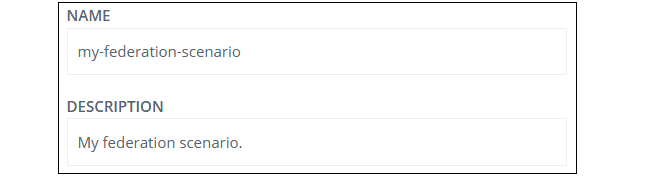
In the EasyAccess WebUI, go to Scenarios > Federation and create a new scenario with the desired type of authentication by pressing the relevant plus button. In this example, the simplest type of scenario will be used which is Username and Password only, without any multifactor authentication. The SAML related setup steps will be the same for any of the other federation scenarios.A guide will now open and the first guide step is to enter a name and optional description for the scenario.
In the next guide step, select a user store. In this example, the LDAP store created in Chapter 4, LDAP Server Setup will be selected. It is also possible to select the Create new option to create a user store connection on the fly.
Now, specify a filter to find the user. In this case, it is enough to use the username. The Search base defines the root on the LDAP server where the users are found.
In the next step, specify an entity ID. This can be any string with no spaces but it must be unique within the SAML federation. Also, specify the post SSO URL, which must be reachable by devices using the federation. This is the URL which the service provider will redirect to for authentication. This URL can also be used by the service provider for downloading the IdP SAML metadata.
The URL specified must have the following form:
<http/https>://<host>/saml/authenticate/<unique_identifier>
Next, select the keystore that was previously uploaded for this scenario. It is possible to select EasyAccess generated keystores but these are self-signed and should be used for testing purposes only.
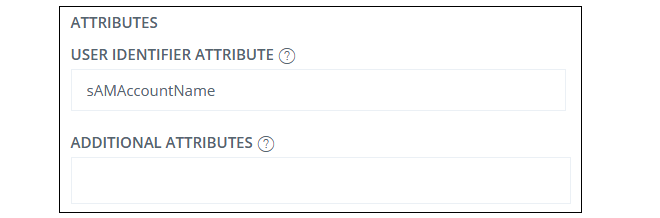
Enter the attribute used as the user identifier. This is the attribute the user will enter at login. This is also the value that will be marked as the nameid in the assertion token. Any additional attributes incorporated in the assertion (SAML Attribute statement) are entered in the Additional attributes field. Multiple attributes are separated by commas.
Specify a default service provider URL to be used with unsolicited SAML requests. Instead of trying to access the service provider first, a user could navigate their web browser directly to the EasyAccess server and this is the meaning of "unsolicited requests". If the Default SP value is left as the value Select default SP then such unsolicited requests will be ignored by EasyAccess.
Alternatively, if the Default SP is set to a particular service provider's URL then this is the URL the browser will be redirected to with the SAML assertion that EasyAccess generates when an unsolicited SAML request arrives (assuming that the user is successfully authenticated first).
For convenience, a selection is also provided in the WebUI to use the test SAML site samltest.id as the default SP. This can be useful for testing purposes and more information about this test site can be found at the following link:
In the final guide step, select Create to save the scenario.
After a short delay, the scenario will be available to process traffic.
E. Configure the Service Provider
The service provider must be correctly configured with the SAML Metadata of the IdP (in this case EasyAccess). The metadata is supplied in one of the following ways:As a URL on the EasyAccess server. This URL is specified by the Post SSO URL.
As an XML file. This file must be created by opening the post SSO URL in a browser and manually copying the XML data into a file. The data can be found by opening the scenario for editing in the EasyAccess WebUI, selecting the Identity Provider tab and selecting the link View SAML Metadata.
The metadata link can be manually constructed in a browser navigation field by appending the string "?getIDPMeta" to the post SSO URL. For example, if EasyAccess is running as the local host, the URL to display the IdP metadata might be the following:
https://localhost:8443/saml/authenticate/samlauth?getIDPMeta
Service providers often have unique requirements for how they are set up to operate with SAML and it is not possible for this section to document this for every possible provider. Usually, the service provider themselves will supply a description of what is required.
Customizing the SAML assertions that EasyAccess generates for a service provider is described in Section 6.4, Customizing SAML Assertions.