| Home Prev | Next |
This section describes the setup when accessing cOS Core for the first time through a web browser. The cOS Core user interface accessed in this way is called the Web Interface. It is assumed that a network connection has been set up from a management computer to the management Ethernet interface, as described in Section 6.1, Management Computer Connection.
![[Note]](images/note.png) |
Note: Some browser screenshot images have been modified |
|---|---|
|
Some of the screenshot images in this section have been modified from original screenshots to suit this document's page format. However, all relevant details in the images have been preserved. |
Connect By Browsing to the Management Interface Address
Using a standard web browser, enter the IP address of the If1 interface, For example, 192.168.1.1 as shown below.

|
Note: HTTP access is disabled for cOS Core 11.01 and later |
|---|---|
|
For cOS Core version 11.01 and later, HTTP management access is disabled in the default configuration and HTTPS must be used. Unencrypted access with HTTP can be enabled by the administrator but this is not recommended. |
Troubleshooting
If there is no response from cOS Core and the reason is not clear, refer to the checklist in Section 6.6, Setup Troubleshooting .![[Important]](images/important.png) |
Important: Do not access cOS Core via a proxy server |
|---|---|
|
Make sure the web browser doesn't have a proxy server configured for the cOS Core management IP address. |
The cOS Core Self-signed Certificate
When responding to the first https:// request in a browser session, cOS Core will send a self-signed certificate to the browser. All browsers will automatically flag this self-signed certificate as posing a potential security risk. In the latest Microsoft browser, the following error message will be displayed in the browser window.
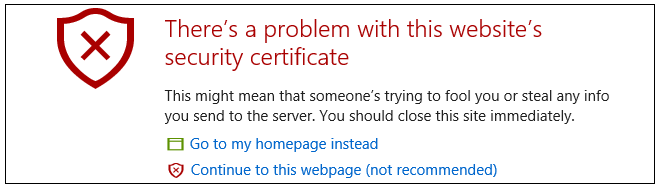
The browser should now be told to accept the Clavister certificate by choosing the option to continue.
|
Note: Sending a CA signed certificate can be configured |
|---|---|
|
It is possible to configure cOS Core to use a CA signed certificate instead of its default self-signed certificate for the management login. Doing this is described in the cOS Core Administration Guide. |
The Login Dialog
cOS Core will next respond like a web server with the initial login dialog page, as shown below.
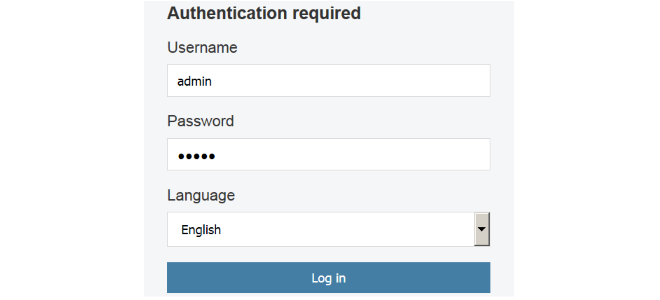
The available Web Interface language options are selectable at the bottom of this dialog. This defaults to the language set for the browser if cOS Core supports that language.
Enter the administrator username as admin and use the default password admin.
Starting the Setup Wizard
After logging in for the first time, the Web Interface will appear and the cOS Core setup wizard should begin automatically as a popup window. If the wizard is blocked by the browser, it can be started manually by pressing the Setup Wizard button in the Web Interface toolbar (shown below).

Once the wizard is started, the first dialog displayed is the wizard welcome screen which is shown below.

Canceling the Wizard
The setup wizard can be canceled at any point before the final Activate screen and run again by choosing the Setup Wizard option from the Web Interface toolbar. Once any configuration changes have been made and activated, either through the wizard, Web Interface or CLI, then the wizard cannot be run since the wizard requires that cOS Core has the factory defaults.The Wizard Assumes Internet Access will be Configured
The wizard assumes that Internet access will be configured. If this is not the case, for example if the firewall is being used in Transparent Mode between two internal networks, then the configuration setup is best done with individual Web Interface steps or through the CLI instead of through the wizard, and this is described in subsequent sections.Advantages of the Wizard
The wizard makes setup easier because it automates what would otherwise be a more complex set of individual setup steps. It also reminds the administrator to perform important tasks such as setting the date and time and configuring a log server.The steps that the wizard goes through after the initial welcome screen are listed next.
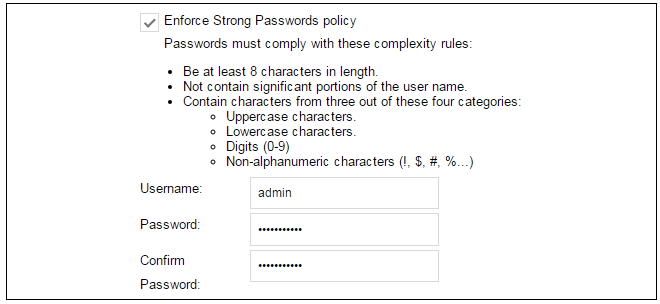
Wizard step 1: Enter a new admin password and optionally change the username
The first step in setup with the wizard is to enter a new password for the admin user. The admin username can also be changed if required, as shown in the screenshot below.The Enforce Strong Passwords option is present in cOS Core versions from 11.05 onwards. This is a global setting that will enforce the listed strong passwords rules for all users in any local user database in the configuration. If required, this option can be disabled later. However, it is recommended to leave this option enabled, which means that the default admin password must be changed to a conforming strong password before the wizard can move on to the next step.
Note that restoring cOS Core to factory defaults will restore the original admin/admin credential combination for management access.
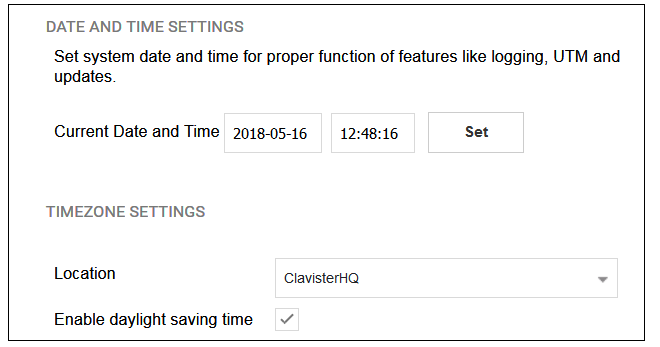
Wizard step 2: Set the date and time
Many cOS Core functions rely on an accurate date and time, so it is important that this is set correctly in the fields shown below. The default time zone location is ClavisterHQ which means the default location and time zone will be Stockholm. If this is not correct it should be changed to another location and timezone using the drop-down list.
Wizard step 3: Select transparent mode interfaces
This step allows any transparent mode interfaces to be set up. If no transparent mode interfaces are required, leave this dialog in the default Normal Mode and go to the next step. Transparent mode interfaces can be configured at any time later, outside of the wizard.
|
Note: This step is only available with version 11.04 or later |
|---|---|
|
The step to optionally set up transparent mode interfaces in the startup wizard is only available with cOS Core version 11.04 or later. Also, the available interface list shown above will vary according to the platform on which cOS Core is running. |
Wizard step 4: Select the WAN interface
Next, you will be asked for the WAN interface that will be used to connect to your ISP for Internet access.

Wizard step 5: Select the WAN interface settings
This step selects how the WAN connection to the Internet will function. It can be one of Manual configuration, DHCP, PPPoE or PPTP as shown below.
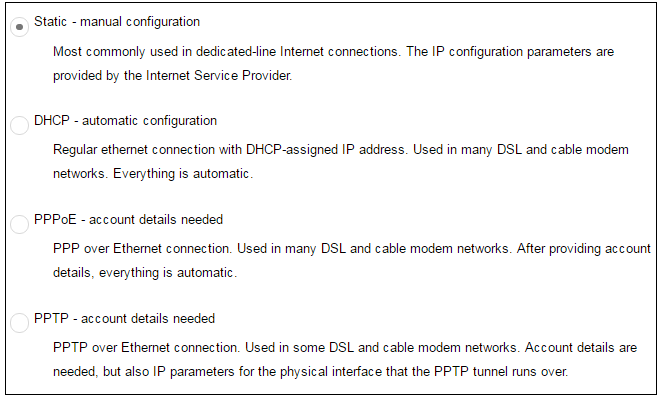
These four different connection options are discussed next in the following subsections 5A to 5D.
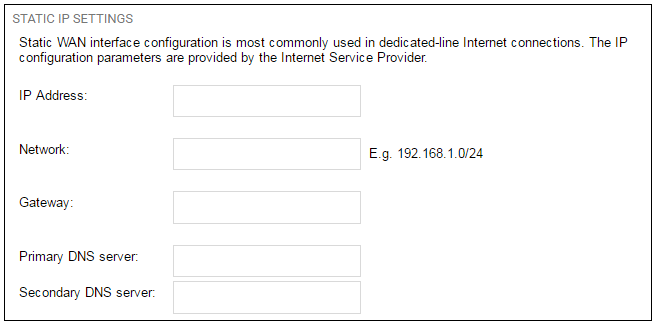
5A. Static - manual configuration
Information supplied by the ISP should be entered in the next wizard screen. All fields need to be entered except for the Secondary DNS server field.
5B. DHCP - automatic configuration
All required IP addresses will automatically be retrieved from the ISP's DHCP server with this option. No further configuration is required for this so it does not have its own wizard screen.
5C. PPPoE settings
The username and password supplied by your ISP for PPPoE connection should be entered. The Service field should be left blank unless the ISP supplies a value for it.
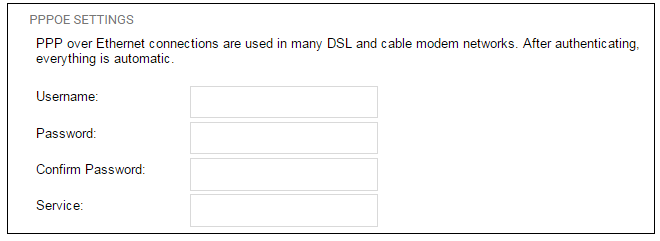
DNS servers are set automatically after connection with PPPoE.
5D. PPTP settings
The username and password supplied by your ISP for PPTP connection should be entered. If DHCP is to be used with the ISP then this should be selected, otherwise Static should be selected followed by entering the static IP address supplied by the ISP.
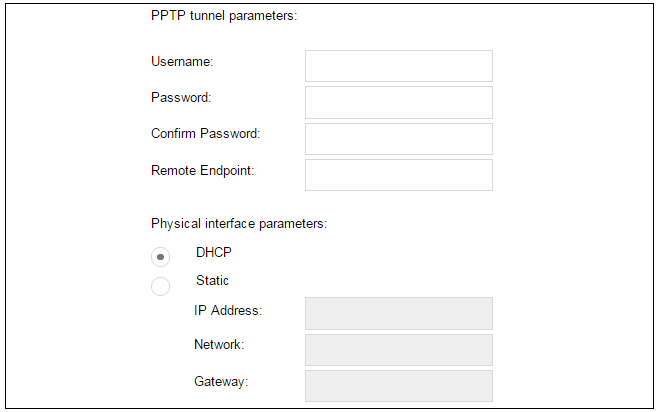
DNS servers are set automatically after connection with PPTP.
Wizard step 6: DHCP server settings
If the firewall is to function as a DHCP server, it can be enabled here in the wizard on a particular interface or configured later.For example, the private IPv4 address range might be specified as 192.168.1.50 - 192.168.1.150 with a netmask of 255.255.255.0.
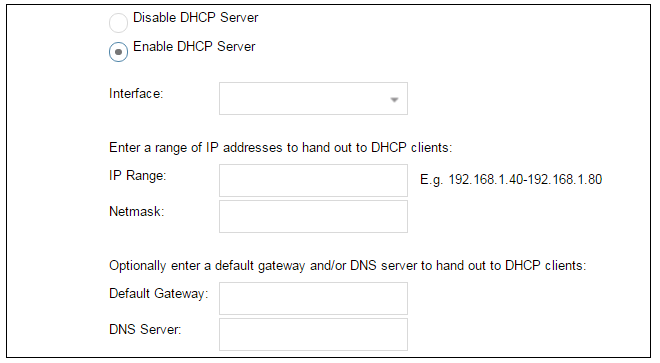
For the default gateway, it is recommended to specify the IPv4 address assigned to the internal network interface. The DNS server specified should be the DNS supplied by an ISP.
Wizard step 7: Helper server settings
Optional NTP and Syslog servers can be enabled here in the wizard or configured later. Network Time Protocol servers keep the system date and time accurate. Syslog servers can be used to receive and store log messages sent by cOS Core.
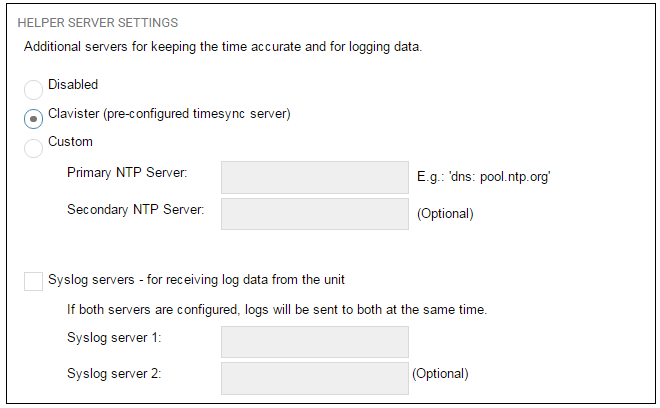
When specifying a hostname as a server instead of an IP address, the hostname should be prefixed with the string dns:. For example, the hostname host1.company.com should be entered as dns:host1.company.com.
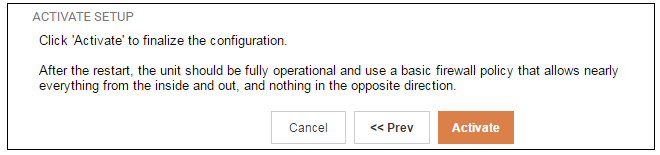
Wizard step 8: Activate setup
The final step is to activate the setup by pressing the Activate button. After this step the Web Interface returns to its normal appearance and the administrator can continue to configure the system.
Running the Wizard Again
Once the wizard has been successfully finished and activated, it cannot be run again. The exception to this is if the firewall has its factory defaults restored in which case it will behave as though it were being started for the first time.A Valid License Should Be Installed
Lastly, a valid license should be installed to remove the cOS Core 2 hour demo mode limitation. Without a license installed, cOS Core will have full functionality during the 2 hour period following startup (except for subscription based features), but after that only management access will be possible. Installing a license is described in Section 6.5, Installing a License.