| Home Prev | Next |
This chapter describes creating a virtual machine by importing a disk image distribution of cOS Core for an x86 based platform. It is assumed that KVM software with QEMU has been installed and is running in the appropriate environment and the relevant software tools have also been installed. This initial tools setup has been previously described in Chapter 1, Overview.
![[Note]](images/note.png) |
Note: Refer to the Knowledge Base for ARM Setup |
|---|---|
|
This chapter describes virtual machine setup for x86 platforms. For creating virtual machines on ARM based platforms, see the article in the Clavister Knowledge Base at the following link: |
Memory Requirements
All cOS Core image files for virtual environments have a predefined memory allocation. This is the minimum amount of memory required for cOS Core to run and it should never be reduced. This default allocation may need to be increased depending on the cOS Core license purchased and the number of connections/tunnels that will be open simultaneously. The minimum memory recommended memory allocation is:The highest possible memory allocation for cOS Core is:
Any available memory above these limits will not be used by cOS Core.
If the allocated memory is insufficient during operation, cOS Core will output console messages indicating this while trying to reduce the number of open connections/tunnels. Eventually, cOS Core will enter safe mode where only management access is possible.
Requirements for AI Use
To use the AI functionality in cOS Core (version 15.00 and up), the license must include support for AI. The standard license does not allow administrators to configure AI functionality by default. In addition, there are requirements for platform and CPU:32 bit x86 : Not supported
64 bit x86: Minimum number of cores: 4
64 bit ARMv8: Minimum number of cores: 3
Creating Virtual Machines on x86 Platforms
Virtual machine creation for the x86 platforms can be done in one of the following ways:Manually using virtual machine manager. This is described next in Section 3.1, Manual x86 Setup.
Automatically using a script. An example script is supplied by Clavister and this is described next in Section 3.2, Script Based x86 Setup.
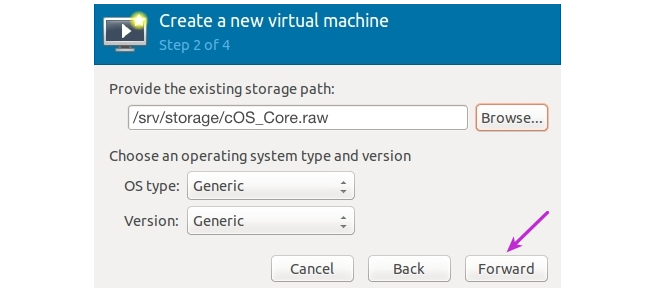
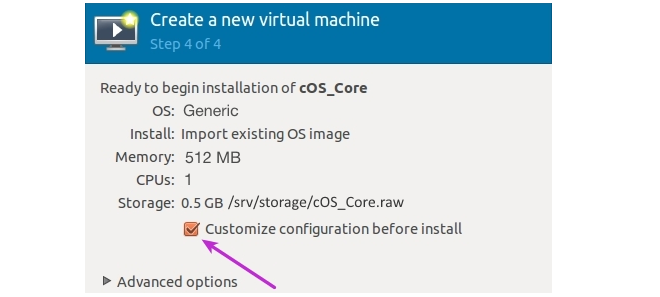
This section describes using Virtual Machine Manager to manually create a virtual machine for cOS Core.


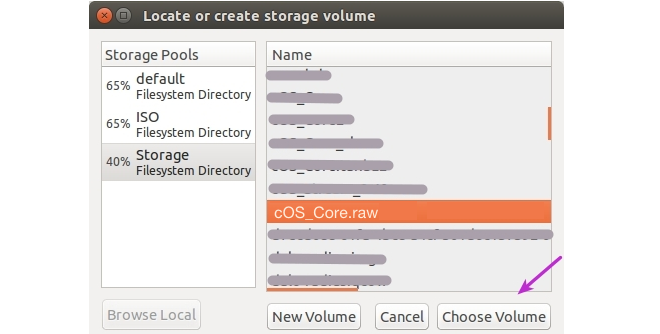

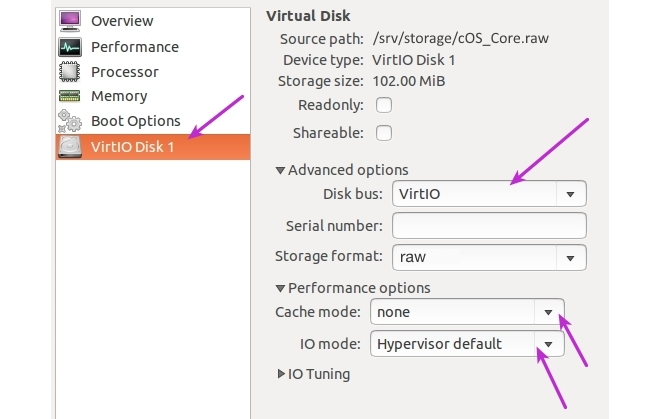
Select the disk from the navigation menu and make sure the following values are entered for the disk driver:
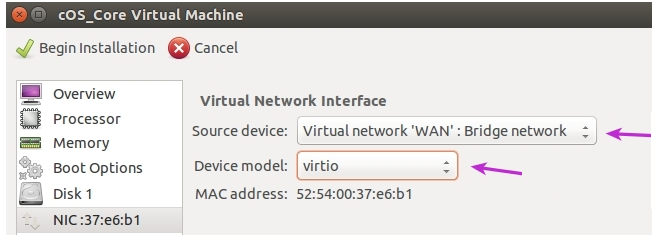
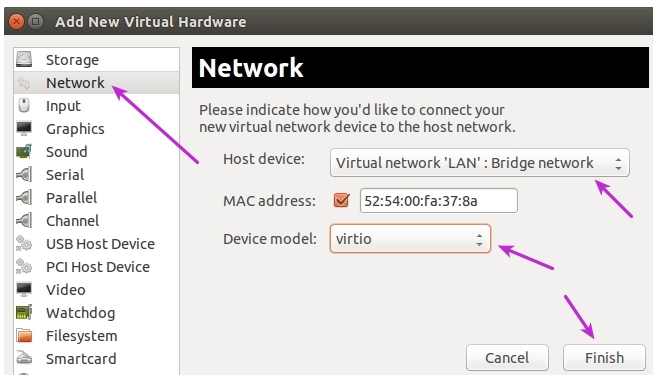
Select Network in the navigation menu and then set Host device to the defined LAN bridge and Device model to virtio.
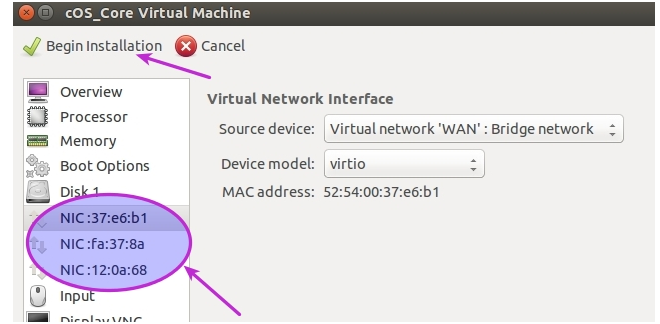
Repeat this process for the third interface.