| Home Prev | Next |
The Hardware Migration Wizard is a separate, standalone software tool that can run on a Windows based computer which facilitates the conversion of a cOS Core configuration from one hardware product to another.
The wizard can also be used when moving a cOS Core configuration from a virtual environment to a Clavister hardware product. However, it cannot be used to move a configuration from a hardware product to a virtual environment.
The wizard is also discussed in a Clavister Knowledge Base article at the following link:
https://kb.clavister.com/324735782
The wizard can be downloaded by logging into the relevant account at https://my.clavister.com and going to Downloads > Tools & Utilities.
![[Tip]](images/tip.png) |
Tip: The wizard is also integrated into InControl |
|---|---|
|
The wizard is integrated into InControl so that interface reassignment can also be done while setting up a replacement firewall in InControl. This is discussed further in the Dissimilar Hardware Replacement chapter of the separate InControl Administration Guide. |
The wizard does not require access to the new firewall while running since its only purpose is to convert a configuration backup file from the old hardware to a backup file for the new hardware.
![[Note]](images/note.png) |
Note: The wizard is only for replacement with different hardware |
|---|---|
|
The wizard is not used when the old and new hardware models are identical. In such cases, the original configuration from the old hardware requires no conversion and can be uploaded as is. Use the wizard only when the new hardware is different from the old hardware and interface reassignment is required. |
The executable file for the wizard has the name: HardwareMigrationWizard_vn.m.exe where n.m indicates the version number of the tool.
The wizard is used as part of a three stage process:
Stage A. Take a backup file of the old hardware's configuration.
Stage B. Process this backup file with the wizard.
Stage C. Upload the new backup file created by the wizard to the new hardware.
If the backup file of Stage A is not available, the wizard cannot be used and the configuration must be manually recontructed, piece by piece, on the new hardware.
Providing a backup file is available, Stage B, running the wizard is possible. This is described next.
Initial Step: Wizard Startup
When the wizard is started, some introductory text is displayed.

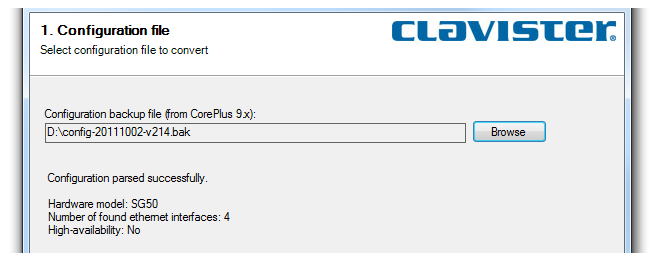
Wizard Step 1. Select a backup file for conversion
A configuration backup file from the old hardware is selected. This file is parsed by the wizard and a summary of its contents is shown.
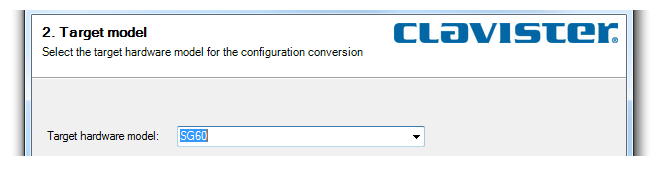
Wizard Step 2. Select the target hardware model
A simple drop-down box presents all the possible target hardware models that the wizard can convert the configuration to. One should be selected.
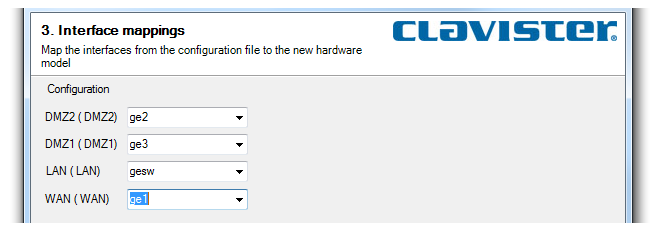
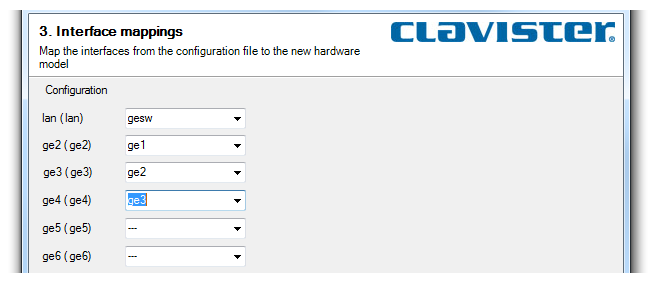
Wizard Step 3. Map the interfaces
The wizard presents a list of the original interface names for the old hardware on the left side and a drop-down box to select the new interface name for the new hardware on the right. The wizard's Next button will not be enabled until the required selections are made.There are three possibilities for this step:
Possibility 1: The new hardware has the same number of interfaces as the old hardware.
Here, a one-to-one mapping is possible between the old and new hardware models.
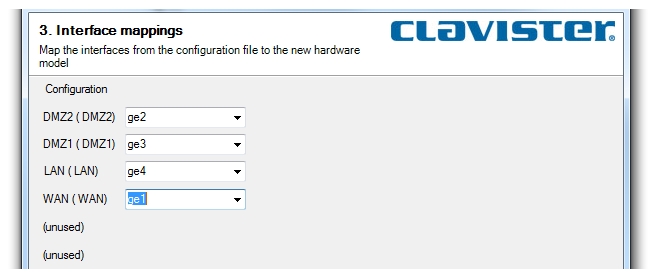
Possibility 2: The new hardware has MORE interfaces than the old hardware.
Here, all interfaces can be mapped. The text (unused) in the interface list for the old hardware indicates that there are more available interfaces on the new hardware than can be mapped.
Possibility 3: The new hardware has LESS interfaces than the old hardware.
Here, not all interfaces can be mapped. Those that are not will be disabled. In the example shown below, the new hardware has only four interfaces compared with the six interfaces of the old hardware. The decision has been made to not map the ge5 and ge6 interfaces of the old hardware.
Wizard Step 4. Save to a backup file
The converted configuration is save to the specified configuration backup file. This is the file that will be later uploaded to the replacement hardware.
Wizard Step 5. Finish
The final step confirms that the conversion has been done successfully.
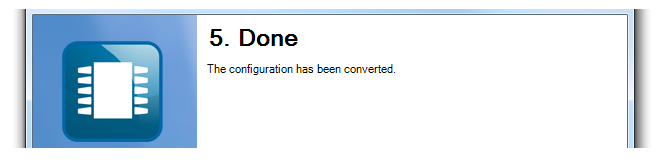
At this point the new backup and ready for uploading to the new hardware.
Fewer Interfaces Will Give Configuration Errors
When the new hardware has fewer interfaces than the old, the extra, unmapped interfaces are removed.However, any references to the unmapped interfaces are not removed or changed and this will cause errors when the new attempting to save and activate the new configuration. The Web Interface screenshot below shows a typical error message.
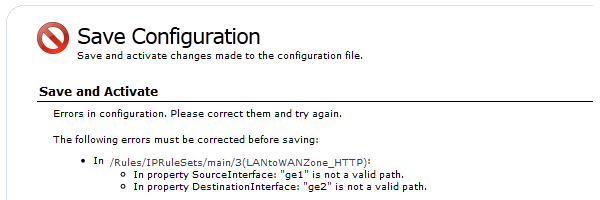
The above message indicates that the IP rule Allow_PING refers to two interfaces, ge1 and ge2, that were not mapped to new interfaces and were removed by the wizard.
The solution is either to manually remove this IP rule or change the interfaces to ones that do exist.