| Home Prev | Next |
The NetWall 100 Series is primarily designed as a desk top unit. However, it can also be installed in a standard 19-inch equipment rack using an optional 100 Series rack mount kit that can be ordered separately.
Before continuing, the following general guidelines for racks should be noted:
The rack or cabinet used for mounting should be adequately secured to prevent it from becoming unstable and/or falling over.
Devices installed in the rack or cabinet should be mounted as low as possible, with the heaviest devices at the bottom and progressively lighter devices installed above.
The 100 Series Rack Mounting Kit
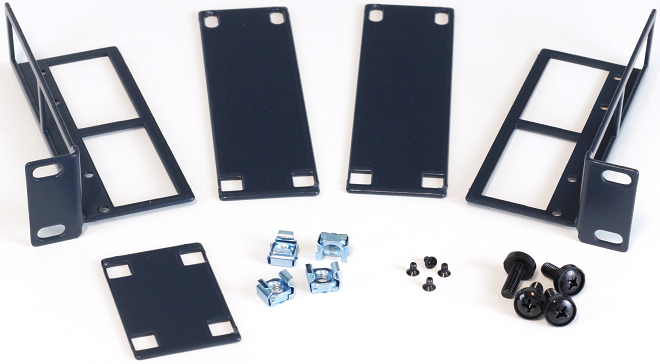
The image below shows the contents of a single rack mount kit for the 100 Series appliance.Note that the mounting of twin side-by-side appliances will require two kits. Also note that a kit is not guaranteed to contain a sufficient number of the bolt/nut combination for final attachment to the rack itself (each kit contains four). However, the kit's bolt/nut combination could be used for this purpose if some are left over and they suit the rack (as shown in Figure 3.2, “NetWall 100 Series Rack Mounting Options”).
Rack Mount Configuration Options
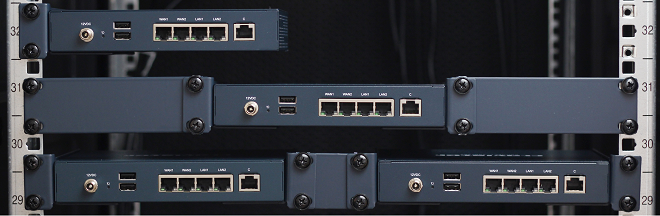
The rack mount kit provides for a choice between a variety of different mounting options. These are:A single 100 Series appliance can be supported on one side only by either side of the rack.
A single 100 Series appliance can be mounted so it is supported by both sides of the rack.
Twin 100 Series appliances can be mounted side-by-side so together they are supported by both sides of the rack.
The above configurations are illustrated in the image below.
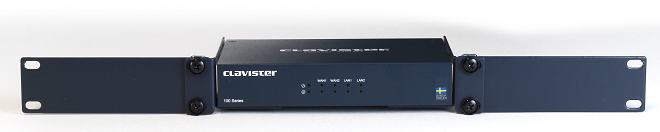
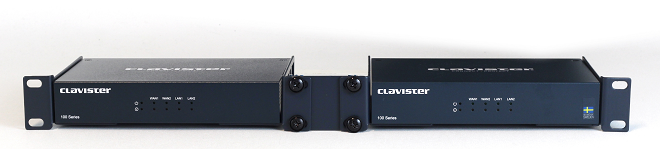
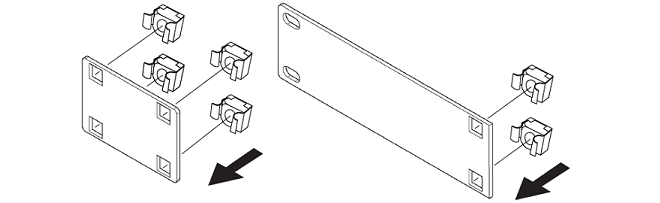
It should be noted that the kit can be used so that either front or the back is supported. This is illustrated in the images below which show the Ethernet ports placed on the unsupported side.
Attaching the Rack Mount Kit
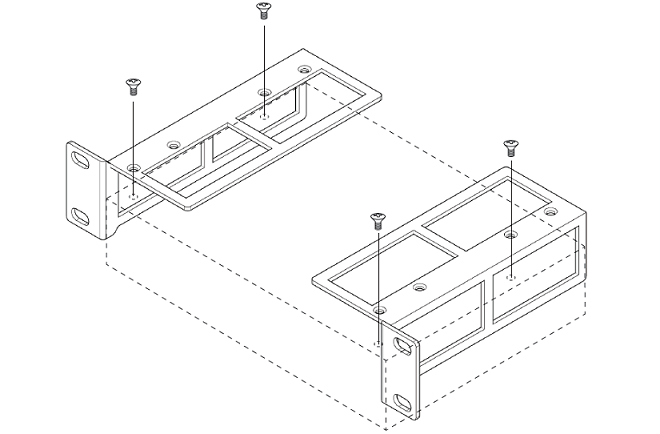
The first step in using the kit is to attach the "L" brackets to the underside of the appliance using the small screws supplied. Only one "L" bracket needs to be attached if the appliance will only be supported by one side of the rack.The schematic below illustrates the assembly for a single appliance supported on both sides.
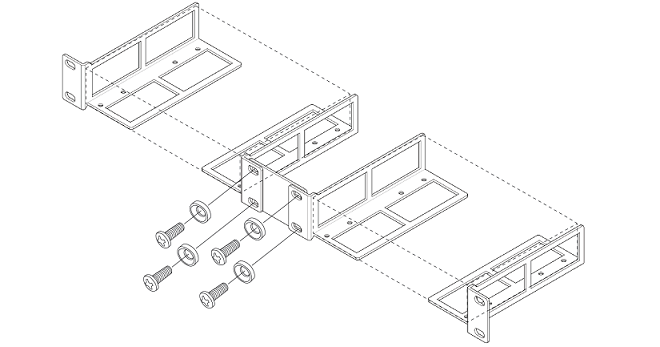
The schematic below illustrates the assembly for twin side-by-side appliances.
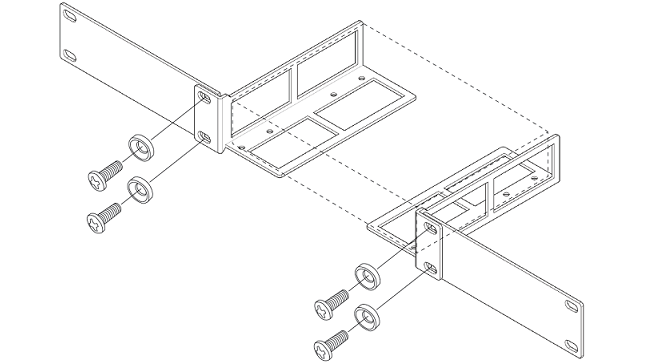
Note that the black bolts in the kit are designed to engage with the provided silver nuts that fit the square holes on the kit extension plates, as shown in the schematic below.