| Home Prev | Next |
The Local User Database
Each firewall maintains its own user database. The users defined in these databases determine the usernames, passwords and permissions for access using the cOS Core Web Interface or using the CLI via direct SSH access for both cOS Core and cOS Stream devices.The InControl User Database
The InControl server maintains a single, central database of users which is completely separate from the cOS Core user databases described above. The InControl database is set up independently of the connected firewalls and provides a way of determining which InControl client users have administrative permissions.Even when opening a CLI console in the InControl client, access is controlled by this central database.
Listing Users
To open the Users tab and list the current users, press the Users button in the Home toolbar.

The Users tab will open to display a current user list.

Only a single user with the name admin and default password admin is predefined in InControl. This user belongs to the predefined User Group called Administrator whose members have full read and write permissions. Another user group called Auditor can contain new users that have read-only access. It is group membership which determines which permissions that a user has.
Creating New Users
A new user can be created by pressing the Add button in the Users tab.

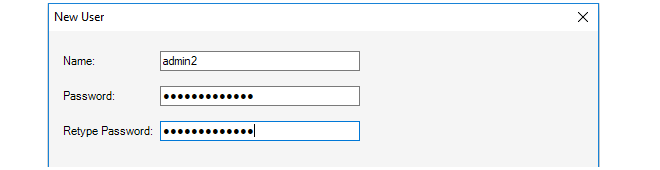
This starts the New User wizard which begins by asking for a unique name, for example admin2, along with a password.
In the final wizard step, the user is assigned to a pre-existing Group. As mentioned previously, group membership determines the permissions that a user has. InControl provides two groups by default, the Administrator group and the Auditor group. In the example shown below, the Administrator group is chosen and the user then inherits its permissions from that group.

Listing Current Groups
To open the Groups tab and list the current groups, press the Groups button in the Home toolbar.

The Groups tab will open to display a current group list.

Against each group entry is shown a summary of permissions along with member users. The user admin2 that was added earlier is shown in the above example.
The Administrator group allows full access to all functions. The Auditor group allows the least permissions which means read-only access to certain data. Creating new groups that have sets of permissions between these extremes is discussed next.
Creating New Groups
A new group can be created by pressing the Add button in the Groups tab.

This starts the New Group wizard and the first step is to specify how the group read/write permissions will be determined. This is shown below.
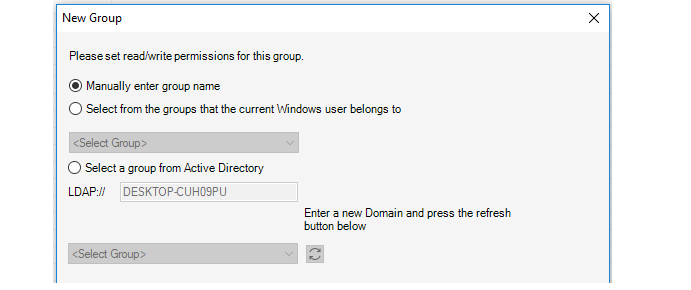
The wizard provides the following options for determining the read/write permissions:
Manually enter group name
The administrator can manually enter the name of the group the user belongs to. This option is for internal authentication only.
Select from the groups that the current Windows user belongs to
Specify a Windows domain from the list given. This means that a user who starts the InControl client will automatically be authenticated against a Windows Active Directory server and will not need to enter their credentials in the login dialog. The user automatically becomes associated with this group and its permissions.
Selecting this option means that the later wizard step of defining the individual users belonging to the group can be skipped.
Some further steps are required if this option is selected and they are described below, after the description of the wizard.
Select a group from Active Directory
This option allows the same type of login as the previous option but the active directory server and associated group can be manually specified. The wizard will automatically select the domain the user is currently logged in with for this option and the administrator can leave this as is or change it.
Selecting this option means that the later wizard step of defining the individual users belonging to the group can be skipped.
Some further steps are required if this option is selected and they are described below, after the description of the wizard.
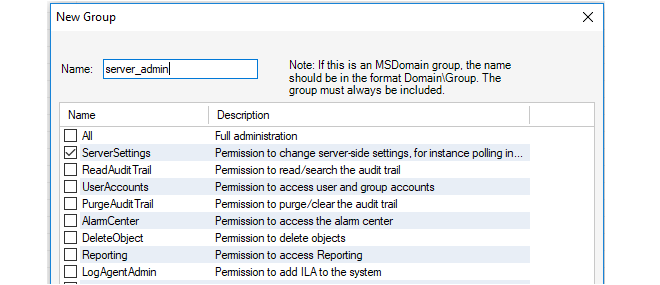
Next, specify a group name, in the example below this is server_admin. Also specify what InControl Server Permissions the group will have. In the example below, the privilege to change server settings is selected.
The next step is to specify what permissions this group has in relation to individual firewalls.
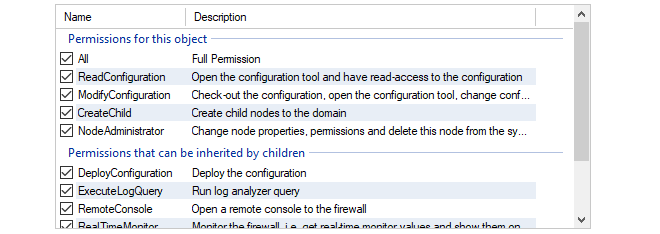
The top panel in this wizard step is used to specify which types of InControl objects in the tree that the permissions will be applied to.
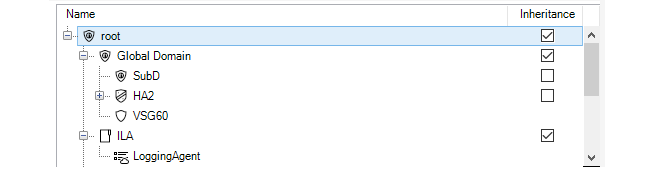
By default, the permissions are specified for the root of the entire tree and this is specified with Inheritance enabled. This means that the same permissions apply to lower tree levels where inheritance can be applied. Alternatively, the permissions could be applied to particular lower level objects within the tree.
Note that permissions are divided into two categories, those that are directly applicable to the type of object selected and permissions that are inherited by children when the Inheritance option is selected.
In the final step, the wizard allows particular local users to be moved into this group. This allows users that already exist to be moved into the group. This step should be skipped if this group is only for Active Directory authentication. In the example below, the user admin2 is being added into the new group.
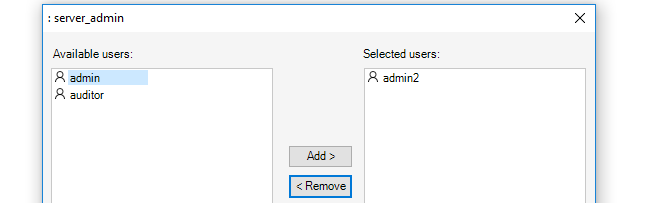
The user admin2 now belongs to two groups. When this happens, the permissions of all the groups a user belongs to are combined to determine what the user can do. In this case, admin2 is already a member of the administrator group so it is probably better to remove them from that group so they have the limited privileges of the server_admin group.
This example also illustrates how group membership can be determined when a user is defined or when a group is defined.
Additional Steps for Active Directory Authentication
If the Active Directory option (MSDomain) was selected in the new group wizard, additional steps are required before this type of authentication can function:Close the InControl client and open the InControl server management interface.
Under RemotingManager, change the AuthenticationMethod setting so that MSDomain is enabled. It is possible to enabled both Internal and MSDomain together, in which case MSDomain will be attempted first and if it fails Internal will be tried.

After setup, the user only needs to press the Login button in the initial login dialog for AD to be used.