| Home Prev | Next |
The Clavister EasyAccess product provides a scalable and highly customizable identity and access management solution. It functions as a standalone product, separate from Clavister firewall products.
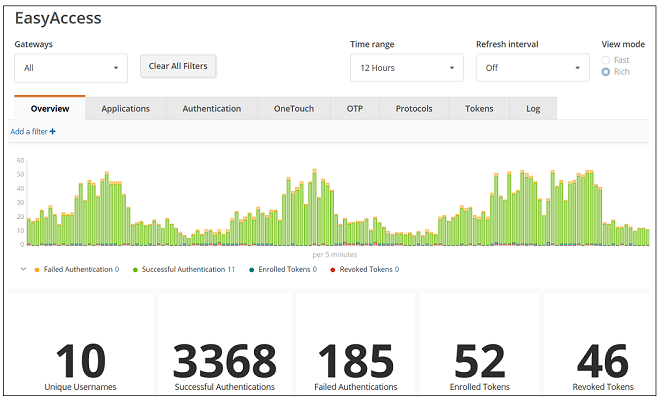
The core component of EasyAccess is a centralized server which can run on different computing platforms. The server can send log event messages about its activity to external log servers. When these log messages are received by the InCenter server, they are stored in the same way as logs from a Clavister firewall and can be displayed in graphical form using the InCenter WebUI. This display is accessed via the EasyAccess menu option in the Analyze menu. Below is an example of the WebUI summary display for EasyAccess.
Setting Up Log Sending in EasyAccess
No configuration of InCenter is required in order to process incoming EasyAccess log messages. However, EasyAccess itself must be configured to send log messages to the InCenter server. The details for doing this can be found in an article in the Clavister Knowledge Base at the following link:https://kb.clavister.com//317174827
In summary, the following changes are required in the EasyAccess server configuration:
Go the folder EasyAccess/Server/Config and open the EasyAccess configuration file log4j2.xml in a suitable text editor.
Between the lines </RollingFile> and </Appenders>, insert the following XML:
<Syslog
  name="CEF"
  host="<InCenter-server-IP-address>"
  port="514"
  protocol="UDP">
  <PatternLayout>
    <Pattern>%m%n</Pattern>
  </PatternLayout>
</Syslog>
Note that if sending logs to a standard Syslog server instead of InCenter, the inserted lines would be:
<Syslog
  name="CEF"
  host="<InCenter-server-IP-address>"
  port="514"
  protocol="UDP">
 facility="LOCAL7"
</Syslog>
Change the <Logger> entry in the <Loggers> section of the file so it has an AppenderRef to the Syslog definition above:
<Logger name="EVENT" level="INFO" additivity="false">
  <AppenderRef ref="EVENT"/>
  <AppenderRef ref="CEF"/>
</Logger>
For Windows, go to the folder EasyAccess/Server/bin and open the file EasyAccess.vmotion in a suitable text editor. Add the following:
-Dcom.phenixidentity.globals.datetimepattern=yyyy-MM-dd'T'HH:mm:ssXXX"
For Linux, open the file binstart-PhenixID.sh in the folder EasyAccess/Server. Add the following to the file as a single line:
JAVA_OPTS="${JAVA_OPTS}
-Dcom.phenixidentity.globals.datetimepattern=yyyy-MM-dd'T'HH:mm:ssXXX"
After saving all changes, restart the EasyAccess server so they take effect.