| Home Prev | Next |
cOS Core is designed to give both high performance and high reliability. Not only does it provide an extensive feature set, it also enables the administrator to be in full control of almost every detail of the system. This means the product can be deployed in the most challenging environments.
A good understanding on how cOS Core configuration is performed is crucial for proper usage of the system. For this reason, this section provides an in-depth presentation of the configuration subsystem as well as a description of how to work with the various management interfaces.
The following methods are available for accessing and managing cOS Core:The Web Interface (also known as the Web User Interface or WebUI) is built into cOS Core and provides a user-friendly and intuitive graphical management interface, accessible from a standard web browser.
The browser connects to one of the firewall's Ethernet interfaces using HTTP or HTTPS (by default, only HTTPS is enabled) and cOS Core responds like a web server, allowing web pages to be used as the management interface.
The Web Interface does not provide centralized management control of multiple firewalls. One browser window can communicate with one firewall, although it is possible to have multiple browser windows open at the same time.
This feature is described further in Section 2.1.4, The Web Interface.
The Command Line Interface (CLI), accessible via the local console port or remotely using the Secure Shell (SSH) protocol, provides the most fine-grained control over all parameters in cOS Core.
This feature is described further in Section 2.1.5, CLI Access and Section 2.1.6, Using the CLI.
Secure Copy (SCP) is a widely used communication protocol for file transfer. No specific SCP client is provided with cOS Core distributions but there exists a wide selection of SCP clients available for nearly all platforms.
SCP is a complement to CLI usage and provides a secure means of file transfer between the administrator's management computer and the firewall. Various files used by cOS Core can be both uploaded and downloaded with SCP.
This feature is described further in Section 2.1.8, Using SCP.
Before cOS Core starts running, a console connected directly to the Clavister firewall's local console port can be used to do basic configuration through the boot menu. This menu can be entered by pressing any console key between power-up and cOS Core starting. It is the cOS Core firmware loader that is being accessed with the boot menu.
This menu is described further in Section 2.1.9, The Local Console Boot Menu.
InControl is a separate Clavister software product for the centralized administration of multiple Clavister firewalls.
InControl provides an intuitive graphical client which runs on a standard Windows based PC. One or multiple clients communicate with an InControl server running on the same or a different Windows based computer. The server acts as a repository for all cOS Core configuration data and mediates all management commands sent by clients. With InControl, it is possible to create global configuration objects which are shared between firewalls so that the object needs to be changed only once on the InControl server and that change is automatically deployed to all affected firewalls.
More information about InControl can be found in the separate InControl Administration Guide.
InCenter is a separate Clavister software product. InCenter provides an intuitive graphical client which is accessed through a standard web browser for managing and analyzing multiple firewalls via a server. The InCenter server can be running on on-premises hardware or it can be accessed as a cloud service provided by Clavister.
More information about InCenter can be found in the separate InCenter Administration Guide.
All management access requires that a Remote Management object exists to allow that access. The predefined Remote Management objects and how to create new ones are described in the next section.
Management access to cOS Core by an administrator depends on two factors:
The IP address assigned to the default management Ethernet interface. This IP address can be changed as long as the new IP still belongs to the network that is allowed by the relevant Remote Management object.
What kind of access the configuration's set of Remote Management objects allow. These objects determine the interface on which management access is permitted, what type of access is allowed via that interface, and which source IP addresses the access can originate from.
The Default Interface and IP for Management Access
The default management interface chosen by cOS Core can be different depending on the hardware platform but is usually the first one found by cOS Core when the available interfaces are first scanned on initial startup. For virtual environments, it is always cOS Core's logical If1 interface.cOS Core assigns the default IPv4 address 192.168.1.1 to this management interface and HTTPS or SSH access is allowed from the 192.168.1.0/24 network.
Remote access over a network to cOS Core is controlled by a set of Remote Management objects and these objects can be any of the following types:
A predefined object of this type called rmgmt_http already exists in the default cOS Core configuration for IPv4 access. A new Remote Management object must be created to allow HTTP/HTTPS management access using an IPv6 address and this is further described later in this section.
cOS Core uses a default self-signed certificate for HTTPS communication but this can be replaced. Doing this is described in a Clavister Knowledge Base article at the following link:
This object type controls access via an SSH client. A predefined object of this type called rmgmt_ssh already exists in the default cOS Core configuration.
This object type controls access via an SNMP client. No object of this type exists in the default cOS Core configuration so one must be created to allow this kind of access.
SNMP access is discussed further in Section 2.5, SNMP.
This object type controls management access from an InCenter server. No object of this type exists in the default cOS Core configuration so one must be created to allow this kind of access.
Setting up this object is explained in the separate InCenter Administration Guide.
This object type controls management access from an InControl server. No object of this type exists in the default cOS Core configuration so one must be created to allow this kind of access.
Setting up this object is explained in the Preparing cOS Core chapter of the separate cOS Core InControl Administration Guide.
This object type controls access from an external computer that uses a REST API to communicate with cOS Core so that changes to the cOS Core configuration can be made under the control of external software. No object of this type exists in the default cOS Core configuration so one must be created to allow this kind of access.
The REST API feature is described further in the separate document entitled Clavister cOS Core REST API.
Predefined Remote Management Objects
The following Remote Management objects are already predefined in cOS Core:rmgmt_http
This is a RemoteMgmtHTTP object which controls HTTP and HTTPS access via the Web Interface. By default, only HTTPS is allowed from the 192.168.1.0/24 network on the default management interface. When upgrading cOS Core with a configuration that already has HTTP access enabled, this access remains unchanged.
rmgmt_ssh
This is a RemoteMgmtSSH object that controls SSH access via the CLI. This is enabled by default and allows SSH access from the 192.168.1.0/24 network on the default management interface.
NetconMgmt
This is an object that controls Netcon communication with an InControl server. Only a single object of this type can exist and it always has this name. The object will only be present as a predefined object on a Clavister hardware device that supports the InControl zero touch feature for automatic addition of devices to InControl control. This object should only be deleted if zero touch will not be used. The zero touch feature is fully described in the separate InControl Administration Guide.
For other types of access, such as SNMP access, additional Remote Management objects must be created.
Configuring IPv6 Management Access
It is possible for administrator access via HTTP/HTTPS to be configured using IPv6. To do this the following steps are needed:Create a new Remote Management object that has an IPv6 address object set for its Network filter.
Enable IPv6 for the interface specified in the Remote Management object and assign an IPv6 address to that interface.
Preventing Loss of Management Access
When the IP address of the management interface or a remote management rule is changed, there is a risk that the change can prevent further management access. cOS Core prevents this in the following ways:Changes made through the Web Interface
For configuration changes to the Web Interface, there is a delay after performing a Save and Activate operation (the default is 30 seconds) followed by an automatic check that the web browser and cOS Core can still communicate. If communication is lost after the delay, the original configuration is restored.
If the administrator expects that configuration changes will break the communication between cOS Core and the web browser (for example, by changing the management IP), they should select Save and Activate then login again before the timeout period expires. This login tells cOS Core that the administrator still has access and the configuration will not revert back to the old version.
Changes made through the CLI over SSH
When using the CLI via an SSH connection, the administrator must first issue the command:
Device:/> activateThis activates the new configuration but the changes are not made permanent until the following command is issued:
Device:/> commitIf the commit command is not issued within a fixed period of time (the default is 30 seconds) after the activate, cOS Core assumes communication has been lost and the original configuration is restored.
If a configuration change breaks SSH communication, the administrator must login in again over SSH in order to issue the commit command and make the changes persistent.
Changes made via the Local Console CLI
Unlike when using SSH, communication with the local serial console cannot be lost if changing a management interface IP address and/or a remote management rule. This means that a commit command can always be issued after an activate command to make changes persistent. However, the administrator must then check manually if access via the management interface is still possible after entering commit.
If the default 30 second delay is too short, the delay can be changed in the configuration's advanced settings. The setting to change has the name Validation Timeout in the Web Interface and NetconBiDirTimeout in the CLI. It is a global setting.
Example 2.1. Changing the Management Validation Timeout
This example will change the validation timeout from its default value of 30 seconds to 60 seconds.
Command-Line Interface
Device:/> set Settings RemoteMgmtSettings NetconBiDirTimeout=60Web Interface
An Alternative Method of Changing the Management Interface
An alternative method of changing the management interface, which avoids the 30 second delay entirely, is as follows:Login using the existing remote management interface, add a new Remote Management object, then activate and commit the change.
Disconnect and then reconnect using the interface specified by the new Remote Management object.
Delete the old Remote Management object and then activate and commit the change.
Changing the Management IP Address
The following example shows how the IPv4 address for access on the default management interface can be changed. The new address must belong to the network allowed by the relevant Remote Management object for that interface. If it does not, the object must be changed to allow the IP.There are two ways of changing the management interface:
Change the IP address of the interface directly. For example, the CLI for this would be:
Device:/> set Interface Ethernet <interface> IP=<ip_address>This is not recommended since the address object in the address book for this IP address would not change and nor would any of the other rules and object that refer to it.
Change the IP address of the address object for the interface IP. This is the recommended method of setting a new management IP address.
Example 2.2. Changing the Management Interface IP Address
This example will change the IPv4 address on the management If1 interface from 192.168.1.1 to 192.168.1.2. Since these belong to the same network, the network or the management policies do not need to be changed.
Command-Line Interface
Device:/> set Address IP4Address InterfaceAddresses/If1_ip
			Address=192.168.1.2
Web Interface
Changing a Remote Management Object
If the network as well as the IP address changes for a management interface, and/or a different interface is used, then the relevant management access rule will also need to be changed as shown in the example below.Example 2.3. Changing a Remote Management Object
This example will change the current HTTP/HTTPS management access to allow access on the If2 interface and from the network defined by the address book object management_net which is already defined. Connection with both HTTP and HTTPS connection will be allowed.
Command-Line Interface
Device:/> set RemoteManagement RemoteMgmtHTTP rmgmt_http
			HTTP=Yes
			HTTPS=Yes
			Network=management_net
			Interface=If2
Web Interface
HA Cluster Management IPs Must Be Different
In an HA cluster, the management IPs should always be different on the master and slave units for their management interfaces. The shared IP address cannot be used for cOS Core management.The individual IPv4 addresses for the management interface of the cluster master and slave units are held in the IP4 HA Address object for that interface and this is duplicated on both master and slave units. If the management interface IP in this address object is changed on one unit it will be automatically copied over to the other unit by the synchronization process.
Example 2.4. Changing the HA Management IP Address
This example will change the slave management IP address for the lan interface to 192.168.1.2 for an HA cluster.
Command-Line Interface
Device:/> set Address IP4HAAddress lan_ha_ip Address:2=192.168.1.2Web Interface
When it is activated and committed, this change will be synchronized over to the other unit in the cluster.
Adding Remote Management Objects
Extra management access objects can be added to a configuration. For example, to allow only HTTPS access on the If2 interface using the Web Interface, an additional RemoteMgmtHTTP could be added as shown in the next example.Example 2.5. Adding Remote Management via HTTPS
This example assumes that a new RemoteMgmtHTTP object is to be added called https_access. This will allow HTTPS access on the If2 interface from any network and use the local database AdminUsers to authenticate the administrator's login credentials.
Command-Line Interface
Device:/> add RemoteManagement RemoteMgmtHTTP https_access
			Network=all-nets
			Interface=If2
			LocalUserDatabase=AdminUsers
			HTTPS=Yes
Web Interface
Management Access Failure from an all-nets Route
If any VPN tunnel is set up and management access no longer works as expected, it is possible that there is a problem caused by an all-nets route being added to the main routing table so management traffic gets routed into the tunnel.To solve this problem, the administrator will need to create a specific route that routes management interface traffic leaving the firewall back to the management sub-network.
The management CLI command provides a summary of all management access methods and their status. The command with no parameters will provide information about all currently configured management methods.Device:/> management
Name Type Mode Interface Network
------------ ----------- --------------- ----------- -----------
InCenter
MySSH SSH PubKey/Password * 0.0.0.0/0However, the command can be narrowed to give more detailed information about a particular management method using the -type option and this will be more helpful for InCenter. For example:
Device:/> management -type=InCenter

               Type: InCenter
             Status: Connected (14m 34s)
          Interface: If1
            Address: 192.168.199.200 (997)
The number 997 in the above is the port number. Similarly for SSH:
Device:/> management -type=SSH MySSH

               Name: MySSH
               Type: SSH
               Mode: PubKey/Password
          Interface: *
            Network: 0.0.0.0/0
Note that the name of the SSH management object must be included after the Type is specified because there may be more than one in the configuration. This is not needed when the Type is InCenter since there can only be one connection. It is also not needed if the type is InControl.
Where the Status field is shown in the above output, it can have one of the following values:
Connection - The management link is being established.
Connected - The management link has been established
Authentication Failed - The management link was attempted but authentication failed.
The management command and its options are also described in the separate cOS Core CLI Reference Guide.
In the default configuration, cOS Core has a predefined local user database called AdminUsers. This contains two predefined user accounts:
Username admin with password admin.
This account has full administrative read/write privileges.
Username audit with password audit.
This account is for monitoring purposes only and has read-only privileges.
![[Important]](images/important.png) |
Important |
|---|---|
|
For security reasons, it is recommended to change the default passwords of the default accounts as soon as possible after connecting with the Clavister firewall. |
Creating Additional Accounts
Extra user accounts can be created as required. Accounts can either belong to the Administrator user group, in which case they have complete read/write administrative access. Alternatively, they can belong to the Auditor user group, in which case they have read-only access.Only One Administrator Account Can Be Logged In
cOS Core does not allow more than one administrator account to be logged in at the same time. If one administrator logs in, then a second or more (using different credentials) will be allowed to login but they will only have audit privileges. In other words, the second or more administrators who login will only be able to read configurations and will not be able to change them.However, cOS Core does allow the same administrator account (in other words, using the same administrator credentials) to be logged in more than once at the same time. This means it is possible, for example, to have a CLI session in progress as an administrator at the same time as also performing administrator management operations through the Web Interface.
cOS Core provides an intuitive Web Interface (WebUI) for management via an Ethernet interface using a standard modern web browser. This allows the administrator to perform remote management from anywhere on a private network or over the Internet using a standard computer without having to install proprietary client software.
The Default Management Interface in Virtual Environments
For a new virtual cOS Core installation with factory defaults, the default management interface is always If1 and this always has a DHCP client enabled for automatic IP address assignment.The Default Management Interface for Clavister Hardware Products
For all Clavister product models with factory defaults, the default interface is indicated in the list below, The IPv4 address of 192.168.1.1 is assigned unless a DHCP client is enabled on the interface in the default configuration.| Clavister Product | Default Management Interface |
|---|---|
| NetWall 100 Series | Physical LAN1. |
| NetWall 300/500/6000 Series NetWall E80/W20/W20B/W30/W50 NetWall X8 |
Physical G1. |
| NetWall RSG-400 | Logical X1 via any physical interface. |
| NetWall E10/E80B | Physical LAN. |
| NetWall E5/E7 | Physical gesw. |
| NetWall W3/W5/W40 | Physical M1. |
| All virtual environments | Logical If1. |
More details on management access and how to change the management interface and/or IP address from the default is described in Section 2.1.2, Configuring Network Management Access.
Setting the Management Computer IP Address
The default management Ethernet interface of the firewall and the external management computer's Ethernet interface must be members of the same logical IP network for communication between them to succeed. Therefore, the connecting Ethernet interface of the management computer should be assigned the following static IP values:The diagram below illustrates management computer connection via a switch.
For some Clavister hardware products, an IPv4 DHCP server is already enabled in cOS Core on the management interface. This means it is necessary only to enable an IPv4 DHCP client on the management computer's Ethernet interface for the computer to get the required IP addresses automatically after connection. Manual configuration is not required. This feature is described in the relevant Getting Started Guide for the hardware product. A DHCP server is never enabled for cOS Core in virtual environments.
For a description of how to set a static IP address on a Windows or MacOS computer, see the relevant appendix in the separate Clavister Getting Started Guide for the platform being used.
Logging on to the Web Interface
To access the Web Interface using the factory default settings, launch a web browser on the external management computer and point the browser to the IPv4 address 192.168.1.1.Note that the protocol must be https:// when accessing cOS Core for the first time (HTTP access can be enabled later if required). With HTTPS, cOS Core will send back its own self-signed certificate for the encryption and the browser will ask the administrator to confirm that a security exception should be made.
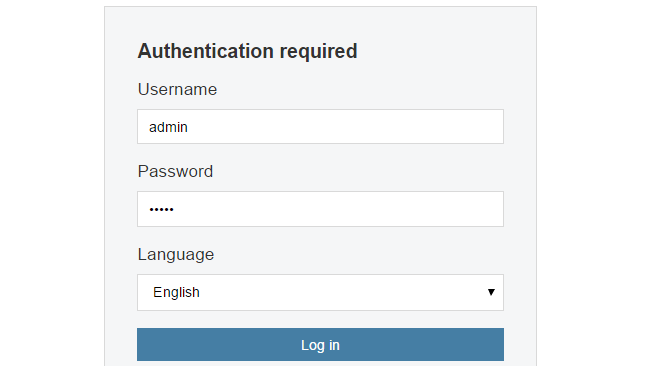
When communication with the cOS Core is successfully established, a user authentication dialog like the one shown below will then be shown in the browser window.
After entering a valid username and password the Login button is clicked. If the user credentials are valid, the administrator is taken to the main Web Interface page.
First Time Web Interface Login and the Setup Wizard
When logging on for the first time, the default username is always admin and the password is admin .After successful login, the cOS Core Web Interface will be presented in the browser window. If no configuration changes have yet been uploaded to the firewall, the cOS Core Setup Wizard will start automatically to take a new user through the essential steps for cOS Core setup and establishing Internet access.
|
Important: Switch off popup blocking |
|---|---|
|
Popup blocking must be disabled in the web browser to allow the cOS Core Setup Wizard to run since this appears in a popup window. |
The wizard can be terminated and setup up done as a series of separate steps through the Web Interface if desired or alternatively through the CLI. Initial setup and the wizard are described in detail in the relevant Getting Started Guide for the computing platform being used.
Multi-language Support
The Web Interface login dialog offers the option to select a language other than English for the interface. Language support is provided by a set of separate resource files.It may occasionally be the case that an upgrade of cOS Core can contain features that temporarily lack a complete non-English translation because of time constraints. In this case the original English will be used as a temporary solution in place of a translation to the selected language.
The Web Browser Interface
The Web Interface is a allows navigation to the various cOS Core subsystems and their related configuration objects. Current cOS Core operational information is shown by default.![[Note]](images/note.png) |
Note: Security policies control remote management access |
|---|---|
|
Access to the Web Interface is regulated by the configured remote management policy. By default, the system will only allow web access from the internal network. For more information about this topic, see Section 2.1.2, Configuring Network Management Access. |
Interface Layout
The main Web Interface page is divided into the following major sections:Menu bar
The menu bar located at the top of the Web Interface contains a series of buttons for accessing different aspects of the configuration.
Object Navigator
The navigator located on the left-hand side of the Web Interface is divided into a number of sections related to the chosen menu bar item.
Main Window
The main window contains configuration or status details corresponding to the section selected in the menu bar or object navigator.
When displaying tables of information in the main window, right clicking a line (for example, an IP policy) will bring up a context menu.
This context menu can be used to add a new object, delete the current, change the ordering and other operations. The Clone function is used to make a complete copy of the current object and then add it as the last object in the table. Below is a typical example of the context menu.

The Web Interface Quick Search Feature
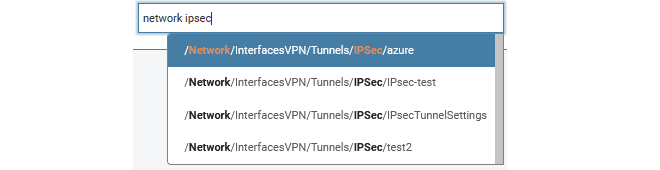
The web interface provides a Quick Search feature for searching the configuration based on configuration paths. The feature is opened wih by clicking the magnifying glass icon in the top right of the Web Interface or using the shortcut Ctrl-P. At first, a drop-down menu of the entire configuration is displayed, as shown below.As text is entered, the complete configuration list is reduced to objects that have paths containing the entered text. Note that the text entered uses spaces as a wildcard. For example, entering "network-ipsec" will display only objects with paths that contain the text "network-ipsec". Entering "network ipsec" will display objects with paths that contain both "network" and then later "ipsec". This is shown in the example below.
Quick search becomes hidden when it loses focus.
Displaying Reference Documentation from the Web Interface
The primary reference documentation for cOS Core is available in two formats; PDF files from MyClavister and HTML from https://docs.clavister.com (the HTML is only for the latest version). The main index page for the HTML cOS Core documentation can be opened in a new browser tab by pressing the question mark icon located at the top-right of the Web Interface.Activating Configuration Changes
As configuration changes are made through the Web Interface, they are not applied to the current running configuration until the administrator asks for them to be activated. Activation is done by choosing the Web Interface menu option Configuration > Save and Activate.cOS Core will then perform a reconfigure operation which might cause only a slight, brief delay to current data traffic. To prevent a change locking out the administrator, cOS Core will revert to the old configuration if communication is lost with the web browser after a fixed time delay (30 seconds by default). This delay is discussed further in Section 2.1.2, Configuring Network Management Access.
|
Note: Examples in this guide assume activation will be performed |
|---|---|
|
Most of the examples in this guide deal with editing cOS Core configurations. The final activation step is usually not explicitly stated. |
Example 2.6. Remote Management via HTTPS with CA Signed Certificates
Command-Line Interface
Device:/> set Settings RemoteMgmtSettings
			HTTPSCertificate=HostA
			HTTPSRootCertificates=RootA2,RootA1,RootA3
Web Interface
These same CA signed certificates are also used by the cOS Core SSL VPN feature when a user is connecting for the first time and a dialog of options is displayed.
![[Caution]](images/caution.png) |
Caution: Do not expose the management interface |
|---|---|
|
The above examples are provided for illustrative purposes only. It is never advisable to expose any management interface to access from the Internet. |
Restarting cOS Core with the Web Interface
The Web Interface can be used to restart cOS Core by selecting the option Status > Maintenance > Reset & Restore. The following restart options are available:Reconfigure
This does not restart the entire system but only reloads the configuration. This is equivalent to the reconf CLI command. In most cases, all connections including VPN tunnels are unaffected.
Apart from reloading the configuration, many of cOS Core's internal data structures related to rules and traffic processing are reinitialized and this can sometimes be a way to solve problems related to memory management.
Restart
This restarts the entire system and is equivalent to the shutdown CLI command. Only cOS Core restarts and not the cOS Core loader. This is the usual method of performing a restart.
Reboot
This restarts the entire system and is equivalent to the shutdown -reboot CLI command. It is similar to the previous Restart option with a graceful shutdown but is also equivalent to switching system power off and on so that the cOS Core boot program is also reloaded. This option is not normally used in standard operation and also requires longer for the restart.
Logging out from the Web Interface
After finishing working with the Web Interface, it is advisable to always logout to prevent other users with access to the workstation getting unauthorized access to cOS Core. Logout is achieved by clicking on the Logout button at the right of the menu bar.Management Traffic Routing with VPN Tunnels
If there is a problem with the management interface when communicating alongside VPN tunnels, check the main routing table and look for an all-nets route to the VPN tunnel. Management traffic may be using this route.If no specific route is set up for the management interface then all management traffic coming from cOS Core will automatically be routed into the VPN tunnel. If this is the case then a route should be added by the administrator to route management traffic destined for the management network to the correct interface.
Every Clavister firewall has a Device Name associated with it which is stored on the cOS Core configuration. This name appears in the title bar of the Web Interface and also appears in the CLI prompt as well as being displayed in large letters at the top of the Status page of the Web Interface.By default, this name is always System but this can be changed to another identifier by going to System > Device > Name in the Web Interface. A comment can also be entered along with a device name.
Changing the device name from the default can be very useful when an administrator is managing multiple firewalls and needs a reminder of which device they are working with.
Enabling the Admin Access Banner
This option provides a configurable login message for administrative access. When enabled, an administrator-defined text banner is presented as a pop-up during WebUI login. The same banner text is also displayed for CLI logins and on the local console, ensuring consistent visibility across management access methods.Typical uses include legal notices, acceptable use statements, maintenance messages, and operational warnings.
This option is not enabled by default.
This section describes the methods for accessing the cOS Core Command Line Interface (CLI) and these are:
Direct access using the local console.
Network access via an Ethernet interface using SSH.
The authentication aspects of these methods will also be discussed. How the CLI is used is described later in Section 2.1.6, Using the CLI.
The local console port is a connection port on the firewall that allows management access to the cOS Core CLI through a direct connection to a management computer. The complete procedure for setting up this connection is described in detail in the relevant Clavister Getting Started Guide for the computing platform used.Note that in a virtual environment, a physical connection is not needed since the local console corresponds to the console of the hypervisor.
In summary, the physical local console setup prerequisites required for Clavister NetWall hardware are the following:
An external management computer or device with the ability to emulate a terminal console. Appropriate communications software may need to be installed for console emulation and this is available from a number of third parties.
A cable with appropriate connectors to connect the external computer with the console port on the Clavister firewall with the computer.
To physically connect a terminal to the console port, follow these steps:
Set the console communication protocol appropriately on the external computer if required.
Connect one of end of the connector cable directly to the local console port on the firewall.
Connect the other end of the cable to the external computer running the console.
Press the enter key on the terminal console. The cOS Core prompt should appear on the console to indicate successful communication.
Enter login credentials if this is required.
Local Console Login Credentials for 32 bit Systems
For 32 bit virtual environments (and also older Clavister x86 (32 bit) based hardware products), there are no login credentials set for local console access in the default configuration. However, a local console password can be set (there is no username) using the boot menu. This is described further in Section 2.1.9, The Local Console Boot Menu. This password will only be applicable to local console access and has no other usage.Local Console Login Credentials for 64 bit Systems
For the Clavister NetWall 100, 300, 500 and 6000 series hardware products and 64 bit virtual systems, there are default local console login credentials set which come from the predefined admin user in the local user database. This user initially has the username admin and password admin. Local console access is controlled by a predefined cOS Core configuration object called Local Management. If required, local console login credentials can be disabled in the Local Management object. Alternatively, a different user database could be set as the source for console login credentials as shown in the below example:Device:/> set LocalManagement RequireAuthentication=Yes
LocalUserDatabase=MyDatabaseResetting a Forgotten Console Password
It can happen that the administrator forgets the console password. The possible options to deal with this circumstance are described in an article in the Clavister Knowledge Base at the following link:https://kb.clavister.com/324735754
Changing the Local Console Port Line Speed
If required, the console line speed can be changed either through the Web Interface or through the CLI, as shown in the example below. Note that changing the speed is only relevant where the local console port has a serial (RS-232) connection.Example 2.7. Setting the Console Line Speed
In this example the console line speed is set to 19200 bps.
Command-Line Interface
Device:/> set COMPortDevice COM1 BitsPerSecond=19200InControl
Follow similar steps to those used for the Web Interface below.
Web Interface
Go to: System > Advanced Settings > Com Port Devices
Click the console port line, configure the speed and then click OK
|
Note: Restart cOS Core after changing the console speed |
|---|---|
|
After changing the local console port speed, the new setting will only come into effect after restarting cOS Core which can be done with the command: A shutdown always restarts cOS Core. |
SSH access is controlled by SSH Management objects in cOS Core. Management SSH access is enabled by default with a predefined object called mgmt_ssh already existing in the default cOS Core configuration. This object allows SSH access on the default management interface with authentication being performed using the predefined local user database called AdminUsers.
Disabling SSH access can be done by deleting the relevant SSH Management object.
Example 2.8. Adding a New SSH Remote Management Object
This example shows how to add a new remote management object for SSH access from the LAN_net network via the LAN interface.
Command-Line Interface
Device:/> add RemoteManagement RemoteMgmtSSH my_ssh_access
			Network=LAN_net
			Interface=LAN
			LocalUserDatabase=AdminUsers
Web Interface
Additional SSH Management Options
In addition to the standard required options, the following additional settings exist in a Remote Management SSH rule.Listening Port
The listening port for the SSH server where cOS Core listens for incoming SSH connection attempts.
Max Concurrent Clients
The maximum number of clients that can be connected at the same time.
Session Idle Timeout
The number of seconds a user can be inactive before the session is closed. Setting the value to zero disables the idle timeout.
Login Grace Timeout
When the user has supplied the username, the password has to be provided within this number of seconds or the session will be closed.
Greeting Message
Specifies the greeting message to display when the user successfully logs in.
Note: Not to be confused with the Admin Access Banner described in Section 2.1.4, The Web Interface. Both messages will be displayed if the Greeting Message and Admin Acccess Banner have been enabled and set.
Maximum Authentication Retries
The number of login retries allowed before the session is closed.
Authentication Type
Type of authentication that should be allowed, Password and/or Public Key. For more information about public key see the Automatic Public SSH Key Authentication further down in this section.
Authentication Source
Whether to use a local database in cOS Core or an external RADIUS server.
Access Level
Optional restriction on the access level of users authenticated by the local database.
Algorithms
For details about algorithms, see the SSH Algorithms Selection further down in this section.
IPv6 must be enabled on the Ethernet interface to be used for management connection and an IPv6 address must also be assigned to it. Doing this is described further in Section 3.2, IPv6 Support.
An SSH Management rule must be added (as in the previous example) which has its Network property set to the IPv6 network (or host) from which the connection will come.
Recommended
This is the default value and uses an optimal selection of algorithms from the key ring to ensure security.
Legacy
This option is not recommended and includes older insecure algorithms. It exists for backwards compatibility only.
Custom
This option allows the administrator to create a custom selection of algorithms from the available choices in the key ring.
The algorithms included for the Recommended and Legacy settings are not listed here, but are displayed in the Web Interface page for the SSH Management object when each setting is selected. In addition, the RemoteMgmtSSH entry in the separate CLI Reference Guide lists the Recommended algorithms as the default property values.
Automatic Public SSH Key Authentication
By default, SSH access requires a username and password to be entered. An alternative is to authenticate automatically by using SSH keys. This method of authentication is useful when using scripts. It is sometimes referred to as public key authentication.Authentication in this way requires that the public key file of a public/private key pair is uploaded to cOS Core and associated with the relevant User object. Both the public and private key files are installed in the connecting SSH client.
SSH key authentication is enabled with the following steps:
Create a suitable set of key files using a third party tool (for example, the PuTTY tool). Key generation can also be done directly within some SSH clients. The key files will consist of a private key file and a public key file. By convention, these are often called id_rsa (the private key) and id_rsa.pub (the public key).
Install the key files into the SSH client. This may already have been done if the client was used to generate the keys.
Add the public key to cOS Core. This can be done in one of the following ways:
Using the Web Interface
Uploading of the public key file can be performed by going to Object > Key Ring in the Web Interface and selecting Add > SSH Public Key. Next, enter a suitable name and then select Upload SSH public key file to upload the file.
Using SCP
When uploaded from an external computer using SCP, the public key file must be stored in the cOS Core folder called sshpublickeys (SCP and this folder are described further in Section 2.1.8, Using SCP). The following is a typical SCP command to do this:
> scp id_rsa.pub admin@203.0.113.5:sshpublickeys/my_public_ssh_key
Note that the public key file will usually have an original filetype of .pub but the filename on cOS Core cannot have a period (".") in the name. If the local filename of the certificate's public key file is id_rsa.pub, this must become something without the period in cOS Core storage. For example, it could get the new name my_public_ssh_key, which is used in the example command above.
Using the CLI
The public key could be added using the cOS Core CLI. The following is an example of a typical command:
Device:/> add SSHPublicKey my-pub-key PublicKey=”ssh-rsa DAB3NzaC1y2”Here, the key must be specified as a string and not a file. The key string in the above command has been shortened. It would typically be much longer.
Adding public keys to cOS Core is also required for centralized management by the InCenter software tool and this is discussed further in the separate InCenter Administration Guide.
In cOS Core, set the SSH Keys property of the relevant User object to be the uploaded public key file. For example, the user admin could be assigned the key file my_public_ssh_key. This step is described in detail in the example below.
Connect to cOS Core using SSH with key authentication. Authentication will now occur automatically and there will be no prompt for credentials to be entered.
Note that the setup procedure for SSH with keys is also described in a detailed article (including screenshots) in the Clavister Knowledge Base at the following link:
https://kb.clavister.com/354852760
Example 2.9. Enabling SSH Authentication Using SSH Keys
This example shows how to enable automatic SSH authentication for the user admin. It is assumed that an SSH public key file called my_public_ssh_key has already been uploaded to cOS Core's sshpublickeys folder using SCP.
Note that after enabling SSH authentication, the configuration changes must be activated and saved like any other changes.
Command-Line Interface
Change the CLI context to be the user database containing the user:
Device:/> cc LocalUserDatabase AdminUsersSet the SSHKeys property of the relevant user to be the uploaded SSH key file:
Device:/AdminUsers> set User admin SSHKeys=my_public_ssh_keyChange the CLI context back to the default:
Device:/AdminUsers>ccDevice:/>
Web Interface
Logging Into the CLI
When access to the CLI has been established to cOS Core through the local console or an SSH client, the administrator will need to log on to the system before being able to execute any CLI command. This authentication step is needed to ensure that only trusted users can access the system, as well as providing user information for auditing.When accessing the CLI remotely through SSH, cOS Core will respond with a login prompt. Enter the username and press the Enter key, followed by the password and then Enter again. After the first startup, cOS Core will allow administrator login with the username admin and the password admin. This default password should be changed as soon as possible.
After a successful login, the CLI command prompt will appear:
Device:/> If a welcome message has been set then it will be displayed directly after the login. For security reasons, it is advisable to either disable or anonymize the CLI welcome message.
Changing the admin User Password
It is recommended to change the default password of the admin account from admin to something else as soon as possible after initial startup. User passwords can be any combination of characters and cannot be greater than 256 characters in length. It is recommended to use only printable characters.To change the password to, for example, my-password the following CLI commands are used. First we must change the current category to be the LocalUserDatabase called AdminUsers (which exists by default):
Device:/> cc LocalUserDatabase AdminUsersWe are now in AdminUsers and can change the password of the admin user:
Device:/AdminUsers> set User admin Password="my-password"Finally, return the current category to the top level:
Device:/AdminUsers> cc
The Console Password Is Sometimes A Separate Password
Note, for virtual environments and older Clavister hardware; products, the password that can be set to protect direct local console access is a separate password and should not be confused with the passwords related to user accounts. This console password is further described in Section 2.1.9, The Local Console Boot Menu.For the Clavister NetWall 100, 300, 500 and 6000 hardware products, the console username and password is the same as the admin user in the default local database. By default, this will be admin and admin. Local console access is controlled by a predefined object called Local Management. The console password can be disabled if desired by changing the Local Management object.
cOS Core provides a Command Line Interface (CLI) for administrators who prefer or require a command line approach to administration, or who need more granular control of system configuration. The CLI is available either directly via the local console or remotely via an Ethernet interface using the Secure Shell (SSH) protocol from an SSH client. CLI access is discussed in the preceding Section 2.1.5, CLI Access.
The CLI provides a comprehensive set of commands that allow the display and modification of configuration data as well as allowing runtime data to be displayed and system maintenance tasks to be performed.
The CLI is case-sensitive. However, the tab-completion feature of the CLI does not require the correct case to perform completion and will alter the typed case if it is required.
This section only provides a summary for using the CLI. For a complete reference for all CLI commands, see the separate Clavister CLI Reference Guide.
The essential CLI commands for adding and manipulating configuration objects are the following:
add - Adds an object such as an IP address or a rule to the configuration.
set - Sets some property of an object to a value. For example, this might be used to set the source interface on an IP policy.
show - Displays the current categories or displays the values of a particular object.
delete - Deletes a specific object.
<command> <object_category> <object_type> <object_name>
For example, to display an IP address object called my_address, the command would be:
Device:/> show Address IP4Address my_addressThe Object Category Can Be Omitted
When typing commands, the object category can be left out where the command's meaning is unambiguous. For example, the show command above could have been entered as:Device:/> show IP4Address my_addressThe same object name could be used within two different categories or types although this is best avoided in order to avoid ambiguity when reading configurations.
|
Note: The terms Category and Context |
|---|---|
|
When describing the CLI, the terms object category and object context are used interchangeably. |
A command like add can also include object properties. To add a new IP4Address object with an IP address of 10.49.02.01, the command would be:
Device:/> add Address IP4Address my_address Address=10.49.02.01
The object type can be optionally preceded by the object category. A category groups together a set of types and mainly used with tab completion which is described below.
The CLI help command will show all available command options. A screenshot of the first part of the output from the help command is shown below:
![[Tip]](images/tip.png) |
Tip: How to display help about help |
|---|---|
|
Typing the CLI command: will give information about the help command itself. |
For example, when creating an IP Policy object, the command line might begin:
Device:/> add IPPolicyIf the tab key is now pressed, the mandatory space is inserted and if the tab key is pressed again the mandatory parameters are displayed:
A value is required for the following properties:

 DestinationInterface  Name     SourceInterface
 DestinationNetwork    Service  SourceNetwork
The following might be now be entered, with DestinationInterface incomplete:
Device:/> add IPPolicy DestinationIIf the tab key is now pressed, the property name is completed by cOS Core to become:
Device:/> add IPPolicy DestinationInterface=Note that completion would not be possible for just Destination because this is still ambiguous and the "I" needs to be added so the first few characters can uniquely identify the property.
The tab key can then be used like this to help complete all the mandatory properties:
Device:/> add IPPolicy	SourceInterface=If2
			SourceNetwork=all-nets
			DestinationInterface=If2
			DestinationNetwork=all-nets
			Service=all_services
			Name=my_example_policy
|
Note: CLI commands in this guide may be reformatted |
|---|---|
|
In order to make the individual elements of CLI commands in this publication clearer, they are sometimes broken into indented separate lines, like the example above. In an actual console window they would appear as a single continuous line which folds at the right margin. |
Optional Parameters Are Tab Completed Last
Tab completion does not work with optional parameters until all the mandatory parameters have been entered. Once the mandatory property values have been assigned, using the tab key will list all the optional properties for the IP Policy object:Optional properties, if no value is specified the default is used: Action Comments Index Schedule AppControl DestAddressTranslation LogEnabled SourceAddressTra Attribute DestinationGeoFilter LogSeverity SourceGeoFilter
Getting the Default or Current Property Value
The period "." character before a tab can be used to automatically fill in the default value for an object property in an Add command. For example:Device:/> add LogReceiver LogReceiverSyslog log_example
Address=example_ip
LogSeverity=.<tab>Device:/> add LogReceiver LogReceiverSyslog example
Address=example_ip
LogSeverity=Emergency,Alert,Critical,Error,Warning,Notice,InfoThis same sequence can be used to get the current property value in a Set command. For example:
Device:/> set LogReceiver LogReceiverSyslog log_example Address=.<tab>This will display the current value for the Address property.
Another usage of the period character before a tab is to automatically fill in the current value of an object property in a command line. This is very useful when there is a need to append a new value to a list of pre-existing values.For example, the following unfinished command may have been typed:
Device:/> set Address IP4Address If1_ip Address=If a period "." followed by a tab is now entered, cOS Core displays the current value for Address. If that value were the IPv4 list 10.6.58.10,192.168.2.1 then the unfinished command line will automatically become:
Device:/> set Address IP4Address If1_ip Address=10.6.58.10,192.168.2.1The displayed values can then be added to or changed with the backspace and back arrow keys before completing the command.
It has been mentioned that objects are grouped by type, such as IP4Address. Types themselves are grouped by category. The type IP4Address belongs to the category Address. The main use of categories is in tab completion when searching for the right object type to use.If a command such as add is entered and then the tab key is pressed, cOS Core displays all the available categories. By choosing a category and then pressing tab again all the object types for that category is displayed. Using categories means that the user has a simple way to specify what kind of object they are trying to specify and a manageable number of options are displayed after pressing tab.
Not all object types belong in a category. The object type UserAuthRule is a type without a category and will appear in the category list after pressing tab at the beginning of a command.
The category is sometimes also referred to as the CLI context. The category does not have to be entered for the command to be valid but always appears when using tab completion. As discussed later, when commands are created automatically using CLI scripting, cOS Core omits the category in the commands it creates.
Selecting Object Categories
With some categories, it is necessary to first choose a member of that category with the cc (change category) command before individual objects can be manipulated. This is the case, for example, with routes. There can be more than one routing table, so when adding or manipulating a route we first have to use the cc command to identify which routing table we are interested in.Suppose a route is to be added to the routing table main. The first command would be:
Device:/>cc RoutingTable mainDevice:/main>
Notice that the command prompt changes to indicate the current category. The route can now be added:
Device:/main> add Route Name=new_route1 Interface=lan Network=If1_netTo deselect the category, the command is cc on its own:
Device:/main> ccDevice:/>
The categories that require an initial cc command before object manipulation have a "/" character following their names when displayed by a show command. For example: RoutingTable/.
Specifying Multiple Property Values
Sometimes a command property may need multiple values. For example, some commands use the property AccountingServers and more than one value can be specified for this property. When specifying multiple values, they should be separated by a comma "," character. For example, if three servers server1, server2, server3 need to be specified then the property assignment in the command would be:AccountingServers=server1,server2,server3Rule sets such as the IP rule set have an ordering which is important. When adding using the CLI add command, the default is to add a new rule to the end of a list. When placement at a particular position is crucial, the add command can include the Index= parameter as an option. Inserting at the first position in a list is specified with the parameter Index=1 in an add command, the second position with the parameter Index=2 and so on. The naming of some objects is optional and is done with the Name= parameter in an add command. An object, such as a threshold rule, will always have an Index value which indicates its position in the rule list but can optionally be allocated a name as well. Subsequent manipulation of such a rule can be done either by referring to it by its index, that is to say its list position, or by alternatively using the name assigned to it.
The CLI Reference Guide lists the parameter options available for each cOS Core object, including the Name= and Index= options.
For convenience and clarity, it is recommended that a name is assigned to all objects so that it can be used for reference if required. Reference by name is particularly useful when writing CLI scripts. For more on scripts see Section 2.1.7, CLI Scripts.The CLI will enforce unique naming within an object type. For reasons of backward compatibility to earlier cOS Core releases, an exception exists with IP Policies which can have duplicate names, however it is strongly recommended to avoid this. If a duplicate IP policy name is used in two IP Policies then only the Index value can uniquely identify each IP policy in subsequent CLI commands. Referencing an IP policy with a duplicated name will fail and result in an error message.
When using InControl as the means of configuring cOS Core, it is possible to use the logical concept of a Domain to share the same object between firewalls.The Domain is a construct that only exists in InControl and not in individual firewall configurations. For this reason, the CLI cannot be used to manipulate domains.
Furthermore, an object in an InControl domain may not necessarily be used in the configuration of a firewall which is a child of that domain. If this is the case, the CLI cannot be used to manipulate a domain object on a firewall that does not use it.
Changing the CLI Prompt and Device Name
The default CLI prompt is:Device:/> Device:/> set device name="my-prompt"Device:/> throughout.
|
Tip: The CLI prompt is the Web Interface device name |
|---|---|
|
When the command line prompt is changed to a new string value, this string also appears as the new device name in the top level node of the Web Interface navigation tree. |
Activating and Committing Changes
If any changes are made to the current configuration through the CLI, those changes will not be uploaded to cOS Core until the command:Device:/> activateDevice:/> commit |
Tip: Examples in this guide assume activation will be performed |
|---|---|
|
Most of the examples in this guide deal with editing cOS Core configurations. The final activation step is usually not explicitly stated. |
If the commit command is not entered after the activate command within a given time period (the default is 30 seconds) then the changes are automatically undone and the old configuration restored. This topic is discussed further in Section 2.1.2, Configuring Network Management Access.
Restarting and Rebooting cOS Core with the CLI
The CLI can be used to reboot cOS Core using the command:Device:/> shutdownThe shutdown command can be followed by an integer between 0 and 60 which is a delay in seconds before the command is executed. For example:
Device:/> shutdown 30The default value for the delay is 5 seconds.
To shut down and restart both cOS Core and completely reinitialize the system, including the cOS Core loader (equivalent to switching the hardware off then on), use the command:
Device:/> shutdown -rebootThe -reboot option is rarely needed in normal circumstances and because it requires more time for the restart it is best not to use it. When cOS Core is upgraded the -reboot option is executed automatically during the upgrade process.
The same restart functions can be performed through the Web Interface by selecting the option: Status > Maintenance > Reset & Restore > Restart.
Initiating cOS Core Reconfiguration with the CLI
cOS Core can be forced to reread and reload the current configuration with the command:Device:/> reconfUnlike the system restart described above, a reconfiguration does not usually affect current connections or VPN tunnels. However, with some IPsec tunnel changes, a reconfiguration will mean the tunnels are lost and have to be reestablished because the tunnel SAs are no longer valid.
Checking Configuration Integrity
After changing a configuration, and before issuing the activate and commit commands, it is possible to explicitly check for any problems in a configuration using the command:Device:/> show -errorsConfiguring Remote Management Access on an Interface
Remote management access may need to be configured through the CLI. Suppose management access is to be through Ethernet interface If2 which has an IP address 10.8.1.34.First, we set the values for the IPv4 address objects for If2 which already exist in the cOS Core address book, starting with the interface IP:
Device:/> set Address IP4Address InterfaceAddresses/If2_ip
			Address=10.8.1.34
The network IP address for the interface must also be set to the appropriate value:
Device:/> set Address IP4Address InterfaceAddresses/If2_net
			Address=10.8.1.0/24
In this example, local IP addresses are used for illustration but these could be public IPv4 addresses instead. It is also assumed that the default address objects for the configuration are stored in an address book folder called InterfaceAddresses.
Next, create a remote HTTP management access object, in this example called HTTP_If2:
Device:/> add RemoteManagement RemoteMgmtHTTP HTTP_If2
			Interface=If2
			Network=all-nets
			LocalUserDatabase=AdminUsers
			AccessLevel=Admin
			HTTP=Yes
If we now activate and commit the new configuration, remote management access via the IPv4 address 10.8.1.34 is now possible using a web browser. If SSH management access is required then a RemoteMgmtSSH object should be added.
The assumption made with the above commands is that an all-nets route exists to the ISP's gateway. In other words, Internet access has been enabled for the firewall.
Managing Management Sessions with sessionmanager
The CLI provides a command called sessionmanager for managing management sessions themselves. The command can be used to manage all types of management sessions, including:Secure Shell (SSH) CLI sessions.
Any CLI session through the local console interface.
Secure Copy (SCP) sessions.
Web Interface sessions connected by HTTP or HTTPS.
Sessions based on the Clavister proprietary Netcon protocol.
The command without any options gives a summary of currently open sessions:
Device:/> sessionmanager

Session Manager status
----------------------
Active connections          :      3
Maximum allowed connections :     64
Local idle session timeout  :    900
Netcon idle session timeout :    600
To see a list of all sessions use the -list option. Below is some typical output showing the local console session:
Device:/> sessionmanager -list

User     Database         IP         Type    Mode     Access
-------- ---------------- ---------  ------- -------  --------
local    <empty>          0.0.0.0    local   console  admin
If the user has full administrator privileges, they can forcibly terminate another management session using the -disconnect option of the sessionmanager command.
The sessionmanager command options are fully documented in the CLI Reference Guide.
To allow the administrator to easily store and execute sets of CLI commands, cOS Core provides a feature called CLI scripting. A CLI script is a predefined sequence of CLI commands which can be executed after they are saved to a file and the file is then uploaded to the Clavister firewall.
The steps for creating a CLI script are as follows:
Create a text file with a text editor containing a sequential list of CLI commands, one per line. The Clavister recommended convention is for these files to use the file extension .sgs (Security Gateway Script). The filename, including the extension, should not be more than 12 characters.
Upload the file to the Clavister firewall using Secure Copy (SCP). There are a number of third party software products that can provide SCP on various computer platforms. Script files must be stored in a directory below the root called script. For example, a typical SCP console command for uploading might be:
> scp my_script.sgs admin1@10.5.62.11:script/SCP uploading is discussed further in Section 2.1.8, Using SCP.
Use the CLI command script -execute to run the script file.
The CLI script command is the tool used for script management and execution. The complete syntax of the command is described in the CLI Reference Guide and specific examples of usage are detailed in the following sections. See also Section 2.1.6, Using the CLI.
|
Note: Uploaded scripts are lost after a restart |
|---|---|
|
Uploaded CLI script files are not held in permanent memory and will disappear after system restarts. |
Only Four Commands are Allowed in CLI Scripts
The commands allowed in a script file are limited to four and these are:
If any other command appears in a script file it is ignored during execution and a warning message is output. For example, the ping command will be ignored.
As mentioned above, the script -execute command launches a named script file that has been previously uploaded to the firewall. For example, to execute the script file my_script.sgs which has already been uploaded, the CLI command would be:Device:/> script -execute -name=my_script.sgs$1, $2, $3, $4......$n
The values substituted for these variable names are specified as a list at the end of the script -execute command line. The number n in the variable name indicates the variable value's position in this list. $1 comes first, $2 comes second and so on.
|
Note: The symbol $0 is reserved |
|---|---|
|
Notice that the name of the first variable is $1. The variable $0 is reserved and is always replaced before execution by the name of the script file itself. |
For example, a script called my_script.sgs is to be executed with IP address 126.12.11.01 replacing all occurrences of $1 in the script file and the string If1 address replacing all occurrences of $2.
The file my_script.sgs contains the single CLI command line:
add Address IP4Address If1_ip Address=$1 Comments=$2
To run this script file after uploading, the CLI command would be:
Device:/> script -execute -name=my_script.sgs 126.12.11.01 "If1 address"When the script file runs, the variable replacement would mean that the file becomes:
add Address IP4Address If1_ip Address=126.12.11.01 Comments="If1 address"
Sometimes, there is a requirement to escape certain characters in a command so they are treated as ordinary characters when the command is executed. This is particularly true for the dollar-sign "$" character. Consider the string: "te$t". In order to have the dollar-sign treated as a normal character, it can be escaped in the normal way by using a backslash "\" character. The string would become "te\$t" and the dollar-sign is no longer treated as special.
Script Validation and Command Ordering
CLI scripts are not, by default, validated. This means that the written ordering of the script does not matter. There can be a reference to a configuration object at the beginning of a script which is only created at the end of the script.Although this approach might seem illogical, it is done to improve the readability of scripts. If something always has to be created before it is referred to then this can result in confused and disjointed script files and in large script files it is often preferable to group together related CLI commands.
If an executing CLI script file encounters an error condition, the default behavior is for the script to terminate. This behavior can be overridden by using the -force option.For example, to run a script file called my_script2.sgs in this way so that errors do not terminate execution, the CLI command would be:
Device:/> script -execute -name=my_script2.sgs -forceIf -force is used, the script will continue to execute even if errors are returned by a command in the script file.
Any output from script execution will appear at the CLI console. Normally this output only consists of any error messages that occur during execution. To see the confirmation of each command completing, the -verbose option should be used:Device:/> script -execute -name=my_script2.sgs -verboseFor example, to move my_script.sgs to non-volatile memory, the command would be:
Device:/> script -store -name=my_script.sgsAlternatively, all scripts can be moved to non-volatile memory with the command:
Device:/> script -store -allTo remove a saved script, the script -remove command can be used. For example, to remove the my_script.sgs script file, the command would be:
Device:/> script -remove -name=my_script.sgsDevice:/> script
Name Storage Size (bytes)
-------------- ------------ --------------
my_script.sgs RAM 8
my_script2.sgs Disk 10To list the content of a specific uploaded script file, for example my_script.sgs the command would be:
Device:/> script -show -name=my_script.sgs
Creating Scripts Automatically
When the same configuration objects needs to be copied between multiple firewalls, then one way to do this with the CLI is to create a script file that creates the required objects and then upload to and run the same script on each device.If a configuration already exists that contains the objects that need to be copied, then running the script -create command on that configuration provides a way to automatically create the required script file. This script file can then be downloaded to the local management computer and then uploaded to and executed on other firewalls to duplicate the configuration objects.
For example, suppose the requirement is to create the same set of IP4Address objects on several firewalls that already exist on a particular firewall. The administrator would issue the following CLI command on the firewall that is to be copied:
Device:/> script -create Address IP4Address -name=new_script.sgsThis creates a script file called new_script_sgs which contains all the CLI commands necessary to create all IP4Address address objects in the configuration. The created file's contents might look something like the following:
add Address IP4Address If1_ip Address=10.6.60.10
add Address IP4Address If1_net Address=10.6.60.0/24
add Address IP4Address If1_br Address=10.6.60.255
add Address IP4Address If1_dns1 Address=141.1.1.1
		"
		"
		"
The file new_script_sgs can then be downloaded with SCP to the local management computer and then uploaded and executed on the other Clavister firewalls. The end result is that all firewalls will have the same IP4Address objects in their address book.
The following should be noted for automatically created scripts:
Automatically created scripts omit the object category.
In the created script example above, adding an IP address is done with the command:
add IP4Address...
This is instead of the usual way of qualifying the object with its category name:
add Address IP4Address...
Both are valid forms of the command. If an object type can be uniquely identified with its name, its object category need not be specified. With automatically generated scripts, this is always the case. This shortened form can also be used when typing the entire command in a CLI console although tab completion will always include the object category.
The script filename length has a limit.
The name of the file created using the -create option cannot be greater than 16 characters in length (including the extension) and the filetype should always be .sgs.
Both Set and Add appear in scripts.
The default configuration objects will have a Set action and the objects added to the default configuration will have an Add action.
Creating scripts for the entire configuration.
It is possible to create a script for the entire configuration with the command:
Device:/> script -create -name=entire_config.sgsThis can be useful if the entire configuration is to be recreated.
However, note that the following objects will not be included in a script created for the entire configuration:
Added Certificate objects.
Objects marked for deletion.
Some objects are always excluded from created script files.
Certain aspects of a configuration which are hardware platform dependent, cannot have a script file entry created when using the -create option. This is true when the CLI node type in the script -create command is one of the following:
These node types are skipped when the script file is created and cOS Core gives the message No objects of selected category or type.
|
Tip: Listing created script commands on the console |
|---|---|
|
To list the created CLI commands on the console instead of saving them to a file, leave out the option -name= in the script -create command. |
# The following line defines the If1 IP address
add Address IP4Address If1_ip Address=10.6.60.10
Scripts Running Other Scripts
It is possible for one script to run another script. For example, the script my_script.sgs could contain the line:script -execute -name my_script2.sgscOS Core allows the script file my_script2.sgs to execute another script file and so on. The maximum depth of this script nesting is 5.
Running Scripts from the Web Interface
It is possible to upload and execute a CLI script through the Web Interface. Following execution of the script, it is not retained in memory.The script does not need to have a filetype of .sgs for this feature to be used. Any filetype is acceptable.
Example 2.10. Running a CLI Script from the Web Interface
In this example, a CLI script called my_script.sgs on local disk storage is uploaded and executed through the Web Interface.
Web Interface
To upload and download files to or from the Clavister firewall, the Web Interface could be used in most cases. An alternative method of file transfer is to use the secure copy (SCP) protocol and an appropriate SCP client. SCP is based on the SSH protocol and many freely available SCP clients exist for most platforms. The SCP command line examples in this section are based on a typical command format for client software.
An example of how upload might be performed is using the command:
> scp <local_filename> <destination_gateway>
An example of how download might be performed is using the command:
> scp <source_gateway> <local_filename>
The source or destination firewall is usually of the form:
<user_name>@<firewall_ip_address>:<filepath>.
For example: admin@10.62.11.10:config.bak. The <user_name> must be a defined cOS Core user in the administrator user group.
|
Note: SCP examples do not show the password prompt |
|---|---|
|
SCP will normally prompt for the user password after the command line but that prompt is not shown in the examples given in this document. |
The following table summarizes the operations that can be performed between an SCP client and cOS Core.
| File type | Upload possible | Download possible |
|---|---|---|
| Configuration Backup (config.bak) | Yes (also with WebUI) | Yes (also with WebUI) |
| System Backup (full.bak) | Yes (also with WebUI) | Yes (also with WebUI) |
| Firmware upgrades | Yes | No |
| Licenses (license.lic) | Yes (also with WebUI) | No |
| Certificates | Yes | Yes |
| SSH public keys | Yes | No |
| Web auth banner files | Yes | Yes |
| Web content filter banner files | Yes | Yes |
cOS Core maintains a simple two level directory structure which consists of the top level root and a number of sub-directories. However, these "directories" such as sshlclientkey should be more correctly thought of as object types. All the files stored in the cOS Core root as well as all the object types can be displayed using the CLI command ls.
The resulting output is shown below:
Device:/> ls

HTTPALGBanners/
HTTPAuthBanners/
certificate/
config.bak
full.bak
license.lic
script/
sshpublickeys/
Apart from the individual files, the objects types listed are:
HTTPAuthBanners/ - The folder containing the HTML banner files for user authentication. Uploading these is described further in Section 6.2.4, Customizing WCF HTML Pages.
HTTPALGBanners/ - The folder containing HTML banner files for HTML ALG dynamic content filtering. Uploading these is described further in Section 6.2.4, Customizing WCF HTML Pages.
certificate/ - The folder containing uploaded X.509 digital certificates for VPN.
script/ - The folder containing all CLI scripts. Scripts are described further in Section 2.1.7, CLI Scripts.
sshpublickeys/ - The folder containing SSH client public key files that allow automatic authentication from an SSH client which has the matching private key installed.
The filename should not have a filetype (in other words, there should be no period character in the name). After upload, the administrator should associate the file with a User object so that user can have automatic authentication enabled.
SSH authentication with certificates is described further in Section 2.1.5, CLI Access.
Examples of SCP Uploading and Downloading
Below are examples of uploading and downloading commands using a typical SCP client. In some cases, a file may be located in the cOS Core root directory. Configuration backup files (config.bak) and the complete system backup files (full.bak) will be saved to the root directory. The cOS Core license file (license.lic) will also be stored in the root.When uploading, these files contain a unique header which identifies what they are. cOS Core checks this header and ensures the file is stored only in the root (all files do not have a header).
If an administrator username is admin1 and the IPv4 address of the Clavister firewall is 10.5.62.11 then to upload a configuration backup, the SCP command would be:
> scp config.bak admin1@10.5.62.11:
To download a configuration backup to the current local directory, the command would be:
> scp admin1@10.5.62.11:config.bak .
To upload a file to an object type under the root, the command is slightly different. If there is a local CLI script file called my_script.sgs then the upload command could be the following
> scp my_script.sgs admin1@10.5.62.11:script/If we have the same CLI script file called my_scripts.sgs stored on the firewall then the download command would be:
> scp admin1@10.5.62.11:script/my_script.sgs .
Activating Uploads
Like all configuration changes, SCP uploads only become active after the CLI commands activate have been issued and this must be followed by commit to make the change permanent.Uploads of firmware upgrades (packaged in .upg files) or a full system backup (full.bak) are the exception. Both of these file types will result in an automatic system reboot. The other exception is for script uploads which do not affect the configuration.
Overview
The Clavister firmware loader is the base software on top of which cOS Core runs and the administrator's direct interface to this loader is called the Boot Menu. This section discusses the boot menu and also how the local console can be used to issue cOS Core CLI commands.The NetWall 100, 300, 500 and 6000 Series Have a Different Boot Menu
Note that this section covers the boot menu for cOS Core in a virtualized environment and on older Clavister hardware products. The boot menu for the Clavister NetWall 100, 300, 500 and 6000 Series hardware products is covered by Section 2.1.10, Boot Menu for the NetWall 100/300/500/6000 Series.Accessing the Local Console Boot Menu
The boot menu is only accessible via the Clavister firewall's local console port. It is displayed by pressing any console key to interrupt cOS Core's startup sequence when the "Press any key to abort and load boot menu" message appears on the console.Once cOS Core has fully started, the boot menu cannot be displayed and a restart is required to have another opportunity to display it. When navigating the boot menu, the up/down arrow keys combined with the enter key can be used to select menu options. The <Esc> key can be used to return to the previous boot menu screen.
The Boot Menu Options Without a Password Set
When the boot menu is displayed without a console password set, the following options are presented:Start System
This closes the boot menu and continues the startup of cOS Core.
Display Latest Shutdown Message
This shows the last cOS Core console message shown before the last system shutdown. This option is not shown if this is the first time that the cOS Core installation has started.
Display Latest Crash Dump Message
This shows the latest crash dump message caused by an error condition in cOS Core. This option will only appear if there is a crash dump to display.
Reset Options
This displays a submenu of reset options. These are described in detail later in this section.
Set a password for console access. Until a password is set, anyone can utilize the console so setting a console is strongly recommended.
The console password can be any sequence of characters but must be no greater than 64 characters in length. It is recommended to use only printable characters.
The console password is only used for console access through the local console port and does not have a username associated with it. It is not related to the credentials used for login through other management interfaces, such as the Web Interface.
Menu Changes After Setting a Console Password
After a password is set, the subsequent boot menu display will initially offer only the following options:Login
This allows the administrator to log into the console using the console password so the complete boot menu can be displayed.
Start System
This closes the boot menu and continues the startup of cOS Core.
After a successful console login, the boot menu is then displayed with the following extra options:
Reset Menu Options
The Reset Options menu offers the following choices:Transfer System to other Boot Media
This option is for older legacy software installations only and is normally not used. It makes it possible to transfer (or copy) an image of the complete cOS Core system to a portable media, such as a USB stick. Booting can then be done using this media on another computer so that the cOS Core system can be installed there on local disk with another "Transfer System" operation.
This option will restore the system to its initial default state. It will not appear if cOS Core is in its default state. The operations performed with this option are the following:
This will only reset the cOS Core configuration to be the original, default configuration. Other aspects of the system, such as console security, will not be affected.
Using the Console for CLI Commands
cOS Core will startup either because the initial startup sequence wasn't interrupted to enter the boot menu or because startup was commenced from the boot menu. Once cOS Core is up and running, the local console can also be used to enter any CLI command in the same way that an SSH client can.If a console password has been set and a login has not yet been performed then cOS Core will prompt for the console password before CLI commands can be entered and it is therefore recommended the console password is enabled as soon as possible in order to prevent unauthorized access.
|
Note: Output buffer limitations |
|---|---|
|
The only limitation with issuing CLI commands through the local console is that there is a finite buffer allocated for output. This buffer limit means that a large volume of console output may be truncated. This happens rarely and usually only with data dumps from certain diagnostic commands. In such cases it is better to issue the commands using an SSH client instead. |
This section covers the boot menu for the Clavister NetWall 100, 300, 500 and 6000 Series hardware products which is accessible through the local console on those appliances. The boot menu for cOS Core in a virtualized environment and on older Clavister hardware products is covered by Section 2.1.9, The Local Console Boot Menu.
Accessing the Local Console Boot Menu
The boot menu is only accessible via the Clavister firewall's local console port. It is displayed by pressing the Esc key to interrupt the cOS Core startup sequence.Once cOS Core has fully started, the boot menu cannot be displayed and a restart is required to have another opportunity to display it.
The Boot Menu Options
When the boot menu is displayed, the following options are presented:Boot System
This closes the boot menu and continues the startup of cOS Core.
Boot-failure recovery
The system will boot using its own internal system memory. cOS Core will then run in a safe mode. This means that the system will function but only limited resources will be available. However, these resources are sufficient for cOS Core to be used with a full CLI command set to troubleshoot problems.
Reset system to factory default
This restores both the current configuration and cOS Core version to the factory settings. Any cOS Core version upgrades that have been installed will be lost.
Restore system default configuration
This restores only the default configuration. No cOS Core version upgrades that have been installed will be lost. This is the recommended option unless a full reset is required.
For system management tasks in the default cOS Core configuration, the administrator logs in to the Web Interface or CLI via SSH using a username and password that are checked against the credentials stored in a local cOS Core database.
An alternative to using a local database is to have cOS Core perform authentication of the entered credentials against an external RADIUS server. This is done by changing the properties of the Remote Management object mgmt_http for Web Interface access and/or the properties of the mgmt_ssh object for CLI access via SSH. Configuring either of these objects for RADIUS authentication consists of the following steps:
Select the Authentication Source property to be RADIUS.
Select the Authentication Order property to be one of the following:
Local First - The login credentials are first looked up in the local user database. If not found in the local database, the configured RADIUS servers are queried.
Local Last - The local database is only queried if none of the configured RADIUS servers responds to an authentication request.
Select one or more RADIUS servers to use for authentication. If there is more than one, they will be tried sequentially if one is unavailable. The servers selected must have already been configured as Radius Server objects in cOS Core (see Section 10.2.3, External RADIUS Servers for how to do this).
Specify the Admin Groups and/or Audit Groups to decide which kind of access will be given once login credentials are authenticated by a RADIUS server. These group names are matched by cOS Core against the group name returned for the user by the RADIUS server. Setting either of these properties to the single wildcard character asterisk "*" means that any group will get that access. Leaving either property blank means no user can have that type of access.
The administrator group names take precedence over the auditor groups. This means if a user is first authenticated by being a member of the administrator groups, auditor group membership is ignored. Therefore, specifying the asterisk "*" character for the Admin Groups property means that auditor group membership will never be checked.
Note that the wildcard "*" character can be used instead of all or part of a group name. For example, the string sys* means any group name that begins with the three letters sys.
|
Important: Group membership must be defined on the server |
|---|---|
|
It is important to note that all management users authenticated by a RADIUS server must have their group membership defined on the RADIUS server. They cannot be authenticated without group membership which cOS Core matches against the Admin Groups and Audit Groups properties. |
The Login Message Changes for a Group Mismatch
Once set up, the login actions taken by the administrator are the same as with non-RADIUS authentication and there is almost no indication in the Web Interface or in the CLI that RADIUS is being used for authentication.However, there is one exception. When the user credentials are correct but the group name returned by the RADIUS server does not match any group in the Admin Groups or Audit Groups, then the Web Interface or CLI will display the following message:
You do not have permission to access this device.
Generated Log Event Messages
Log messages indicate a successful or unsuccessful login by the administrator. With RADIUS management authentication, the log message will show the following field values:The usergroups field will show a list of all the group memberships returned by the authenticating RADIUS server. This is often helps in troubleshooting why a user was unable to successfully login.
The access_level indicates the privileges granted for successful authentication.
The authsource field will have the value RADIUS.
The userdb field will have the value of the RADIUS server object name used.
The server_ip is the IP of the cOS Core interface the client is connecting to. It is not the IP of the authenticating RADIUS server.
The client_ip is the IP of the computer the user is trying to login from.
Below are some typical examples of log event messages:
Successful RADIUS Authentication
A successful login with the user being part of the system_admins group:
event=admin_login authsystem=HTTP interface=If1 username=jdoe
usergroups=sys_admins access_level=administrator authsource=RADIUS
userdb=radius_auth1 server_ip=192.168.1.1 server_port=80
client_ip=192.168.1.30 client_port=6132
Insufficient Access Rights
The user entered a correct username and password but the group name returned by the RADIUS server (sys_admins in the example below) was not found in either the Admin Groups or Audit Groups lists:
event=admin_authorization_failed action=disallow_admin_access
authsystem=HTTP interface=If1 username=jdoe usergroups=sys_admins
authsource=RADIUS	userdb=radius_auth1 server_ip=192.168.1.1
server_port=80 client_ip=192.168.1.30 client_port=6042
Servers Unreachable
All configured RADIUS servers were unreachable and a timeout condition occurred:
event=admin_authsource_timeout authsystem=HTTP interface=If1 username=jdoe
authsource=RADIUS server_ip=192.168.1.1 server_port=80
client_ip=192.168.1.30 client_port=5987
The Local Console is a Fallback Option
It is possible that the administrator could be locked out from logging on via the Web Interface or the CLI over SSH because a RADIUS server will not authenticate the entered credentials and the local database is not allowed to do it either. In such cases, the local console port on the Clavister firewall can still be used for management access. However, if the password has been set for the local console then that password must still be given to get CLI management access (note that the console password is totally separate from other management passwords).Example 2.11. Enabling RADIUS Management Authentication
This example will change the current default rule for Web Interface management access so that authentication is performed using two RADIUS servers. It is assumed that the RADIUS server objects are already defined in the configuration and have the names radius_auth1 and radius_auth2 where radius_auth2 is the fallback server in case the other fails to respond.
The Authentication Order will be set to Local First which will mean that the local cOS Core database will be consulted first. If the user is not found there then the RADIUS servers will be queried.
All users who are members of the group sys_admins are allowed full access privileges. All other authenticated users will have audit privileges only.
Command-Line Interface
Device:/> set RemoteManagement RemoteMgmtHTTP rmgmt_http
			AuthSource=RADIUS
			AuthOrder=LocalFirst
			RadiusServers=radius_auth1,radius_auth2
			AdminGroups=sys_admins
Web Interface
To ensure system security, cOS Core has a global option to enforce the use of strong passwords for users in any local user databases. This option is only available in cOS Core version 11.10.00 and later.
A strong password is defined by cOS Core as follows:
It must be at least 8 characters in length.
It must not contain significant portions of the username.
It must comply with at least three of the following four requirements:
It must contain at least one lowercase character.
It must contain at least one uppercase character.
It must contain at least one digit (0 to 9).
It must contain at least one non-alphabetic character such as !, $, # or %.
If it is not disabled in the setup wizard then the wizard will require a conforming strong password to be entered to replace the default weak admin password. If running the setup wizard is skipped and the strong password option is left enabled, cOS Core will not allow configuration changes to be activated until the admin password conforms to the strong password rules.
If setting up cOS Core for the first time, it is strongly recommended that the first step taken is to change the admin user password from the default weak value of admin to a password that conforms to the strong password rules.
If the strong passwords option is enabled, there are two occasions when new passwords are checked for strength:When a new user is added to a local user database and the password specified.
When the password of an existing user is changed.
Apart from the user admin, a fresh cOS Core configuration will also have a pre-existing user called audit with the default password audit. The audit user password will remain weak until the administrator changes it to a password that conforms to the strong password rules listed above.
Upgrading Older cOS Core Versions
The strong passwords feature was introduced in cOS Core version 11.10.00. If an older cOS Core version than this is upgraded to a 11.10 version or later, the strong passwords option is always disabled after the upgrade. The strong passwords option must be manually enabled by the administrator if it is required.However, all passwords for users created before the upgrade will be flagged as not having strong passwords, even if the strong password option is enabled later. If a weak password for a user from the old configuration is to be made strong then the password for that user should be changed to a strong password after the upgrade. If the strong passwords option is enabled, cOS Core will make sure that the new password conforms to the strong password rules when it is entered.
Checking User Password Status
When the user list for a local user database is displayed in the Web Interface, there is a column with the title Strong Password. This has a value of either Yes or No which indicates if the password conforms to the strong password rules or not.Example 2.12. Disabling Strong Passwords
Although not recommended, this example shows how strong passwords are disabled so that they are no longer enforced by cOS Core in local user user databases.
Command-Line Interface
Device:/> set Settings MiscSettings EnforceStrongPasswords=NoInControl
Follow similar steps to those used for the Web Interface below.
Web Interface
Under the Remote Management section of the Web Interface or InControl a number of advanced settings can be found. These are:
SSH Before Rules
Enable SSH traffic to the firewall regardless of configured IP rule set entries.Default: Enabled
WebUI Before Rules
Enable HTTP(S) traffic to the firewall regardless of configured IP rule set entries.Default: Enabled
Netcon Idle Timeout
Number of seconds of inactivity until the Netcon session is close.Default: 600
Netcon Before Rules
For Netcon traffic to cOS Core: add an invisible rule to the IP rule set to allow Netcon traffic. If this setting is disabled then Netcon traffic will be subject to the IP rule set like any other traffic.Default: Enabled
NetconMaxChannels
For Netcon traffic to cOS Core the following number of connections are guaranteed for each connection type:Default: 18
Validation Timeout
Specifies the amount of seconds to wait for the administrator to log in before reverting to the previous configuration.Default: 30
WebUI HTTP port
Specifies the HTTP port for the Web Interface.Default: 80
WebUI HTTPS port
Specifies the HTTP(S) port for the Web Interface.Default: 443
HTTPS Certificate
Specifies which certificate to use for HTTPS traffic. Only EC and RSA certificates are supported.Default: HTTPS
Configuration Objects
The system configuration is built up by Configuration Objects, where each object represents a configurable item of any kind. Examples of configuration objects are routing table entries, address book entries, service definitions, IP Policies and so on. Each configuration object has a number of properties that constitute the values of the object.Object Types
A configuration object has a well-defined type. The type defines the properties that are available for the configuration object, as well as the constraints for those properties. For instance, the IP4Address type is used for all configuration objects representing a named IPv4 address.Object Organization
In the Web Interface the configuration objects are organized into a tree-like structure based on the type of the object.In the CLI, similar configuration object types are grouped together in a category. These categories are different from the structure used in the Web Interface to allow quick access to the configuration objects in the CLI. The IP4Address, IP4Group and EthernetAddress types are, for instance, grouped in a category named Address, as they all represent different addresses. Consequently, Ethernet and VLAN objects are all grouped in a category named Interface, as they are all interface objects. The categories have actually no impact on the system configuration; they are merely provided as means to simplify administration.
The following examples show how to manipulate objects.
Example 2.13. Listing Configuration Objects
To find out what configuration objects exist, you can retrieve a listing of the objects. This example shows how to list all service objects.
Command-Line Interface
Device:/> show ServiceInControl
Follow similar steps to those used for the Web Interface below.
Web Interface
A list contains the following basic elements:
Add Button - Displays a dropdown menu when clicked. The menu will list all types of configuration items that can be added to the list.
Header - The header row displays the titles of the columns in the list. The tiny arrow images next to each title can be used for sorting the list according to that column.
Rows - Each row in the list corresponds to one configuration item. Most commonly, each row starts with the name of the object (if the item has a name), followed by values for the columns in the list.
A single row in the list can be selected by clicking on the row on a spot where there is no hyperlink. The background color of the row will turn dark blue. Right-clicking the row will display a menu which gives the option to edit or delete the object as well as modify the order of the objects.
Example 2.14. Displaying a Configuration Object
The simplest operation on a configuration object is to show the values of its properties. This example shows how to display the contents of a configuration object representing the telnet service.Command-Line Interface
Device:/> show Service ServiceTCPUDP telnet

          Property  Value
 -----------------  -------
             Name:  telnet
 DestinationPorts:  23
             Type:  TCP
      SourcePorts:  0-65535
         SYNRelay:  No
   PassICMPReturn:  No
              ALG:  <empty>
      MaxSessions:  1000
Comments: TelnetInControl
Follow similar steps to those used for the Web Interface below.
Web Interface
Example 2.15. Editing a Configuration Object
When the behavior of cOS Core is changed, it is most likely necessary to modify one or several configuration objects. This example shows how to edit the Comments property of the telnet service.
Command-Line Interface
Device:/> set Service ServiceTCPUDP telnet Comments="Modified Comment"Show the object again to verify the new property value:
Device:/> show Service ServiceTCPUDP telnet

          Property  Value
 -----------------  -------
             Name:  telnet
 DestinationPorts:  23
             Type:  TCP
      SourcePorts:  0-65535
         SYNRelay:  No
   PassICMPReturn:  No
              ALG:  <empty>
      MaxSessions:  1000
         Comments:  Modified Comment
InControl
Follow similar steps to those used for the Web Interface below.
Web Interface
Verify that the new comment has been updated in the list.
|
Important: Configuration changes must be activated |
|---|---|
|
Changes to a configuration object will not be applied to a running system until the new cOS Core configuration is activated. |
Example 2.16. Adding a Configuration Object
This example shows how to add a new IP4Address object, here creating the IPv4 address 192.168.10.10, to the address book.
Command-Line Interface
Device:/> add Address IP4Address myhost Address=192.168.10.10Show the new object:
Device:/> show Address IP4Address myhost

              Property  Value
 ---------------------  -------------
                 Name:  myhost
              Address:  192.168.10.10
       UserAuthGroups:  <empty>
 NoDefinedCredentials:  No
             Comments:  <empty>
InControl
Follow similar steps to those used for the Web Interface below.
Web Interface
Example 2.17. Deleting a Configuration Object
This example shows how to delete the newly added IP4Address object.
Command-Line Interface
Device:/> delete Address IP4Address myhostInControl
Follow similar steps to those used for the Web Interface below.
Web Interface
The row will be shown with a strikethrough line indicating that the object is marked for deletion.
Example 2.18. Undeleting a Configuration Object
A deleted object can always be restored until the configuration has been activated and committed. This example shows how to restore the deleted IP4Address object shown in the previous example.
Command-Line Interface
Device:/> undelete Address IP4Address myhostInControl
Follow similar steps to those used for the Web Interface below.
Web Interface
Listing Modified Objects
After modifying several configuration objects, you might want to see a list of the objects that were changed, added and removed since the last commit.Example 2.19. Listing Modified Configuration Objects
This example shows how to list configuration objects that have been modified.
Command-Line Interface
Device:/> show -changes

    Type           Object
    -------------  ------
 -  IP4Address     myhost
 *  ServiceTCPUDP  telnet
A "+" character in front of the row indicates that the object has been added. A "*" character indicates that the object has been modified. A "-" character indicates that the object has been marked for deletion.
Web Interface
Activating and Committing a Configuration
After changes to a configuration have been made, the configuration has to be activated for those changes to have an impact on the running system. During the activation process, the new proposed configuration is validated and cOS Core will attempt to initialize affected subsystems with the new configuration data. |
Important: Committing IPsec Changes |
|---|---|
|
The administrator should be aware that if any changes that affect the configurations of live IPsec tunnels are committed, then those live tunnels connections will be terminated and must be reestablished. |
If the new configuration is validated, cOS Core will wait for a short period (30 seconds by default) during which a connection to the administrator must be reestablished.
If a lost connection could not be re-established then cOS Core will revert to using the previous configuration. This is a fail-safe mechanism and, amongst other things, can help prevent a remote administrator from locking themselves out.
Example 2.20. Activating and Committing a Configuration
This example shows how to activate and commit a new configuration.
Command-Line Interface
Device:/> activateThe system will validate and start using the new configuration. When the command prompt is shown again:
Device:/> commitThe new configuration is now committed.
InControl
Activating and committing changes with InControl is done in a different way to the Web Interface
Web Interface
The web browser will automatically try to connect back to the Web Interface after 10 seconds. If the connection succeeds, this is interpreted by cOS Core as confirmation that remote management is still working. The new configuration is then automatically committed.
|
Note: Changes must be committed |
|---|---|
|
The configuration must be committed before changes are saved. All changes to a configuration can be ignored simply by not committing a changed configuration. |
Configuration Revision Numbers
Every time a new configuration version is created and activated, a configuration revision number is allocated to the version. This number has two parts and is of the form nn:mm.The first part of the number, nn, is incremented every time a new configuration is activated through a non-InControl interface such as the Web Interface or CLI. The second part of the number, mm, is incremented every time a new configuration is activated through an InControl client. In the Web Interface, only the first part is displayed as the Configuration number in the start page.