| Home Prev | Next |
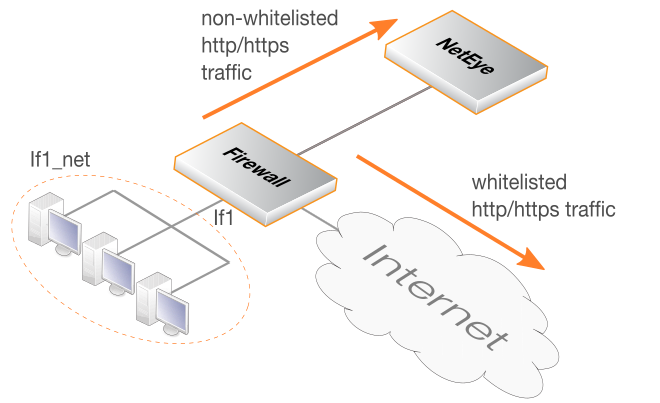
Some websites will not allow SSL inspection (for example, because of certificate pinning) and it will not be possible to reach these sites through NetEye. This means that such sites need to be whitelisted so that traffic to those sites is routed directly to the Internet instead of passing through NetEye. The diagram below illustrates how NetEye whitelisting functions.
This section will provide details of setting up whitelisting in NetWall firewalls running cOS Core.
![[Important]](images/important.png) |
Important: cOS Core Version 12.00.19 or later is required |
|---|---|
|
For whitelisting to function with COS Core, the cOS Core version must be 12.00.19 or later. |
Whitelisting Setup Steps in cOS Core
The following steps are required to set up whitelisting in cOS Core for NetEye:Ensure that the version of cOS Core that is running is 12.00.19 or later.
Create FQDN Address objects that contain all the whitelisted FQDNs. Wildcards could be used. If there is more than one, the address objects can be combined to create an FQDN Group object.
Create a Policy-based Routing Rule with the following characteristics:
The forward and return routing tables must be the original routing table used for client traffic (this is normally the main table).
The rule triggers on the same filter criteria as the rule used for sending traffic to NetEye except use the FQDN group as the destination network.
The rule must be positioned in the ruleset above the routing rule that was created for traffic going to NetEye.
This section describes how to use the cOS Core WebUI to whitelist certain FQDNs from NetEye processing.
A. Configure FQDN Address Objects and FQDN Address Group
The whitelisted FQDNs must first be configured in cOS Core as an FQDN Address object. This is done by selecting Objects > Address Book > Add > FQDN Address in the WebUI.Specify the FQDN of the whitelisted sites. Wildcarding can be used. In the example below, all the sites for the domain example.com will be whitelisted.
If more than one domain is to be whitelisted, combine the FQDN address objects into an FQDN Group object. A group is created by selecting Objects > Address Book > Add > FQDN Group in the WebUI.
Add the FQDN address objects that make up the group.
![[Note]](images/note.png) |
Note: FQDN wildcards require a DNS Profile |
|---|---|
|
For FQDN wildcards to function, a DNS Profile object must also be associated with the IP policy that allows DNS traffic to flow to the Internet. This is explained further in the FQDN Address Objects section of the separate cOS Core Administration Guide. If wildcards are not used, a profile does not need to be created. |
B. Configure a Policy-based Routing Rule
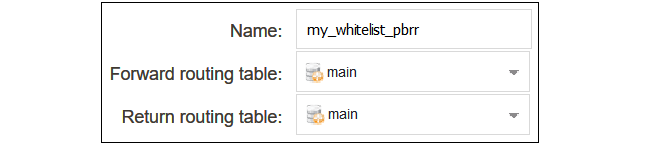
A Policy-based Routing Rule is required so that whitelisted traffic will use the its original routing table and will not trigger the routing rule that sends traffic to NetEye. To do this, select Network > Routing > Policy-based Routing Rules > Add > Routing Rule in the WebUI.Enter a suitable name for the routing rule and set the forward and return routing table to the traffic's original routing table (this will usually be the main table).
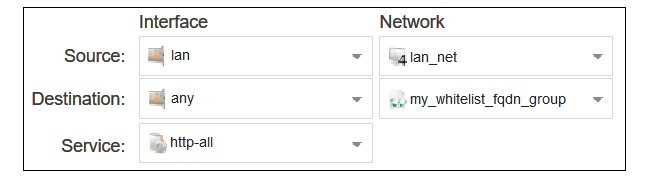
For the routing rule filter, specify an FQDN address object or FQDN address group for the destination network that will be whitelisted. The value any can be used for the interfaces. The source network and interface should be the relevant values for the location of the clients. The service should be set to the targeted traffic, in this case http-all.
After creating the routing rule, it must be moved to a position above the routing rule that sends client traffic to NetEye. This can be done by dragging and dropping the rule in the rule list using the mouse.
The changed configuration can now be committed and activated. It is assumed that a suitable IP policy exists in the configuration which will allow client traffic to flow to the Internet.